Friday, August 24, 2012

Back to School DIY: More Than Just Your Regular Notebook


Those who know me personally and have taken classes with me know that I have never been satisfied with just regular notebooks when I'm in school. I just can't have the same deal as everyone else. I have to make everything my own! So I always brainstorm during the summer what I'm going to do to my notebooks to make them better than last years'. This year they have to be a bit extra special since I am starting at Parsons and of course, they had to be reflective of who I am and want to be as a designer. Since I don't have any materials whatsoever like I used to back in PR and I have a very limited budget, I was juuuuust about to give in to having regular, plain notebooks until I walked in to my school's nearest Utrecht art supply store and went nuts with their paper section. I took a bookmaking course in college with one of my most esteemed professors and never went back after that. I've been making books and my own paper for a few years now so I really appreciate a fine paper creation when I see one. One of my best books was covered in handmade marbleized nepalese lokta paper so I almost squealed with joy when I saw their HUGE variety as it instantly became one of my favorite materials to work with. Since I posted a picture on Instagram of my notebooks and have gotten a few requests on how to make them, I'll show you a quick tutorial on how I covered my notebooks. Bear with me, the pictures were taken with my phone's camera so they're not the best quality. 
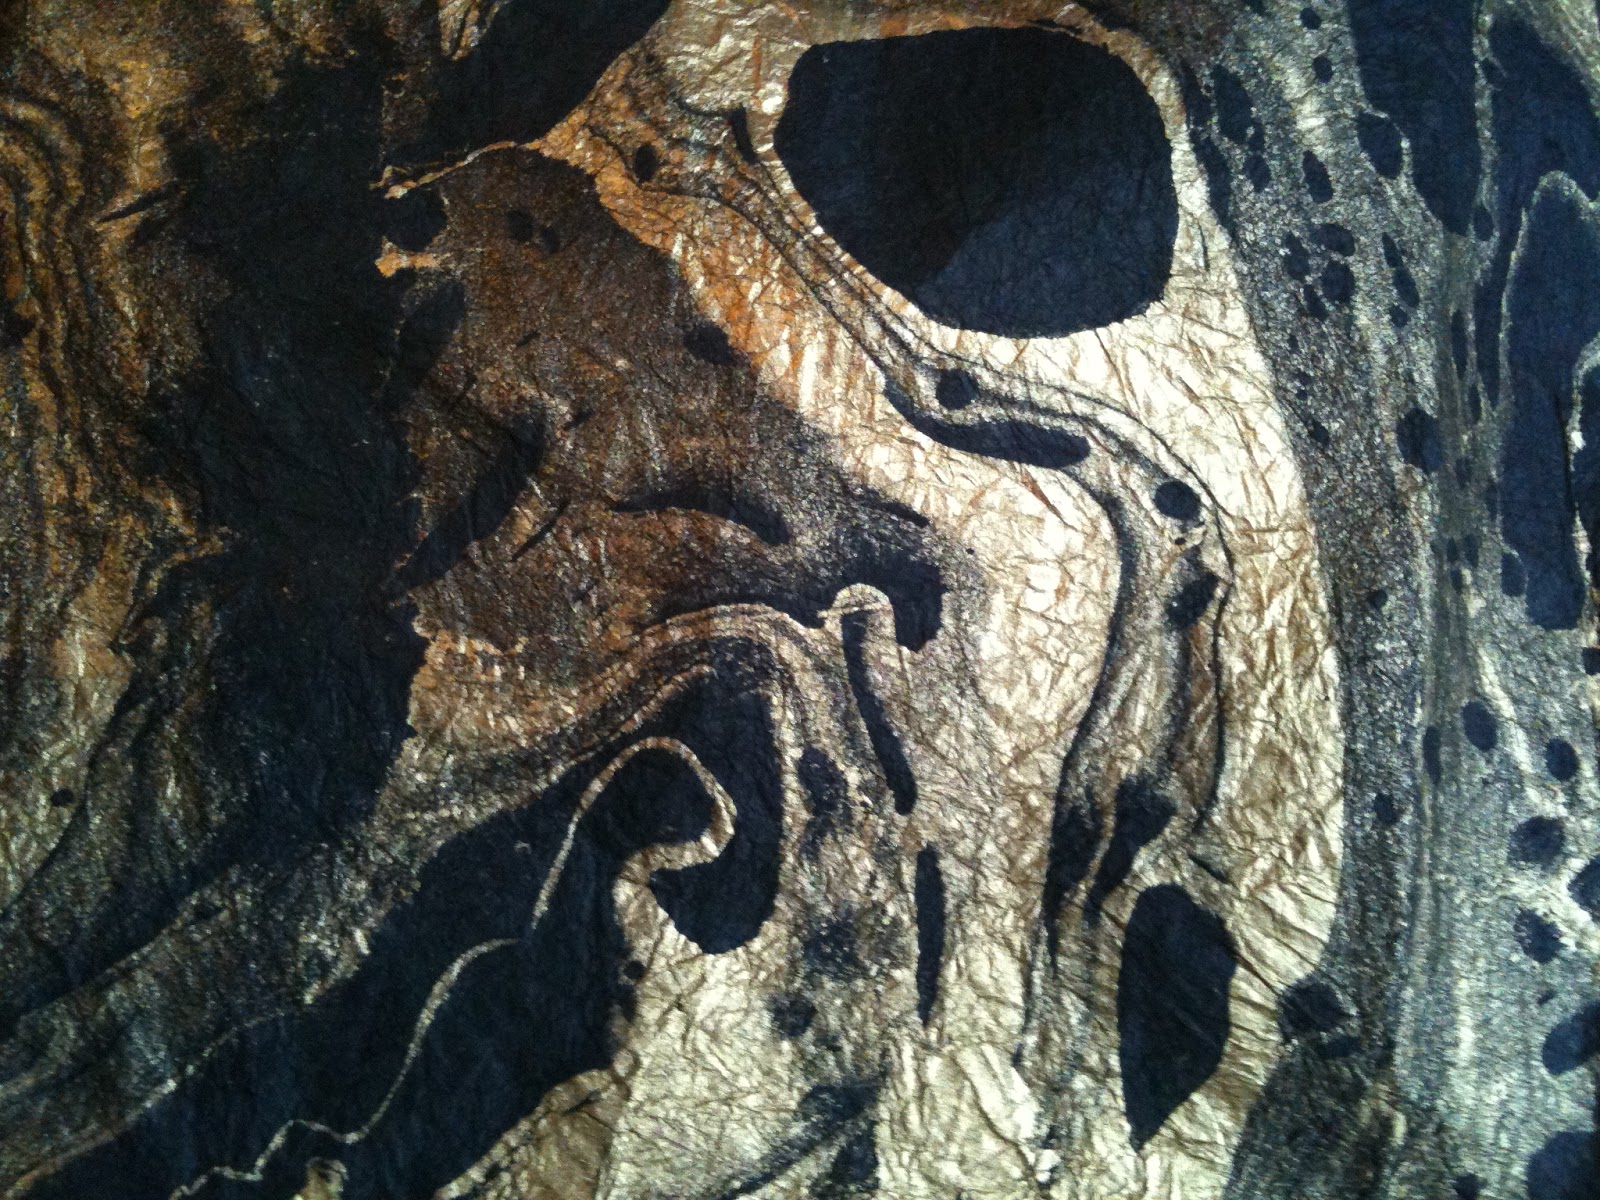
As I mentioned above, I used handmade marbleized nepalese lokta paper, but you can choose any paper you'd like just as long as you don't ruin it when you moisten it. Go crazy! You can use magazines too and make a collage. What I did was basically Mod-Podging this to my notebook. I didn't want to compromise the beautiful texture and quality of the paper by covering it with plastic so I opted for this. Look how gorgeous the texture! One sheet was big enough to cover all seven of my notebooks and it only cost me $4.99.


You'll need:


• Notebook(s)
•Paper to cover notebooks 
• Neutral pH polymer (glue)
•Brush or sponge
•Ruler
•Scissors 
•Pencil 
•Iron (optional)


Step 1: Measure out your notebook and cut out the paper accordingly. I added about half an inch or so on each side just so I can fold in the excess and guarantee that everything will hold and be covered. 


Step 2: With your brush/sponge, apply glue evenly from the center outwards on the cover. It is VERY important that you use a pH neutral adhesive for this so over time, the paper will not suffer from acidity. I found this book making adhesive at Utrecht but one of the best kept secrets is that regular white school glue is basically the toughest thing you can use just as long as you apply some heat afterwards. Just make sure that it's not washable and is neutral. That's where the iron comes in after you've glued the paper on but let's not get ahead of ourselves. You can also use Matte Medium (for painting).


Step 3: Eyeball your paper placement and set it down over the glued cover. Flatten out any air bubbles. Since this paper has such rich texture, I let the wrinkles show. If you're using school glue, this is the moment to put your iron on a low setting and fix the glue with heat. Just gently run the iron over the surface until most moisture is released from the glue.


Step 4: On the reverse side of the cover, dab some glue on the edges and fold in the excess paper. Do the same iron procedure here if you're using school glue.


Step 5: Since my notebook is coil bound, I had to figure out a way to close off that end so I simply cut off the paper in between coils so I could tuck the excess paper un between. I dabbed on some glue and pressed down the tabs in between. The ones on top of the coils I let them on because they looked like fringe and I liked it, but you can cut those off if you like. If your notebook is not coil bound, simply continue the process on the back cover.


Step 6: Apply an even coat of the glue all over so you can seal in the fiber and the paper will last you longer. Doing this might give the paper some sheen, but it will not compromise the quality of the paper entirely and you'll still get the rich texture. Get between the cracks! Let it dry for about ten minutes and voilá! You're done! 


Easy, right? I'm really excited to show these off at school. I encourage you all to try it out. I think the result with this paper is chic, elegant, eye catching and interesting. I know I'm making a big deal out of school notebooks, but just think that you'll be carrying these around all semester long so it's nice to have something pretty to carry around and look at. If you have any questions, please feel free to comment below. I'll be more than happy to help you out! Happy back to school, everybody!

Satchel: Leather Satchel Co. courtesy of  www.Fave8.com 

Tuesday, August 21, 2012

Satchel Mania: The Leather Satchel Co.!


Hey, guys! Hope that transition from summer to fall is going smoothly. I'm doing great adjusting to New York. I started school orientation this week at Parsons and I am simply loving it (classes start next week and I've already got assignments!). I've met so many amazing people so far (including some fellow puertorrican students!) and getting around the city easily. If you might not have noticed, I'm in love with this city. Sure, it hasn't been easy in some aspects. I'm away from the people I love the most including my boyfriend and my mom but in the end, there are sacrifices we all have to make in order to move forward in life and these are just some of my daily challenges. Anyways, enough about me! I've got an exciting in depth review to share with you guys and I'm pretty sure you'll get pumped about this one as much as I am. Are you into the satchel mania?

The bag came with a special note from the company!


Today, I bring to you guys The Leather Satchel Co. Now, beforehand we have to set some things straight. You might have heard around about the Cambridge Satchel Co. Trust me that your view on things will change when I tell you that they're designs aren't the original ones. After doing some research I found out that they've only been around for a few years (around 2006-ish, I believe). The Leather Satchel Co. has been making top quality, hand made satchels since 1966 and their product is backed up by various artisanal guilds. And what a coincidence that Cambridge Satchel Co.'s bags look just like the Leather Satchel Co.'s ones?! This is just the first factor of comparison I have. I've held both satchels in my hand and I can confidently say that I made the right choice with going with the Leather Satchel Co. Even the quality of the leather, the cut, and finish is more refined! The leather is much more flexible yet thicker than Cambridge's. Oh, and it's also backed up with a 5-year warranty which other companies fail to offer and that on its own should be a definite seller. Also, they're pretty much on the same level with their pricing. Give or take a few dollars but if you ask me, you'll definitely get your money's worth with the Leather Satchel Co.


Since I'll be starting school soon, I was contemplating the idea of getting a satchel as I've seen that they're incredibly sturdy, stylish and practical. For this occasion, I got to customize my satchel and choose from the variety of colors and finishes the company has to offer. I decided to go with Pitch Black (which is one of their patent finishes) on the body of the bag, Cloud Cream on the front pocket, Snow White for the tab and strap features and silver hardware. I'm thinking this is a color combination I can use with practically everything. The only thing about the patent finish vs. the original matte finish is that the patent leathers may show some fingerprints but I've come to conclude that it's easier to take care of and camouflages any stains the bag might get eventually with usage. Plus, those fingerprints can easily be wiped off. No biggie!

My satchel is 12.5" so maybe I'll switch it up later and get a 14" satchel so I can fit in my MacBook for school.  Even so, this bag fits quite a lot of baggage. In it I can fit my makeup bag, wallet, agenda, sunnies, cel phone, keys, and a few other important necessities quite comfortably.


Also, the company attaches to your bag a little keychain with a swatch of the leather your bag is made of which I think is a charming little detail on their part. I like to think that it's their way of showing off their craftsmanship pride. The bag does come with the company's logo embossed on the back pannel of the bag but this little tag is visible to anyone. Of course, you can take it off if you wish, but I'm thinking I'll keep mine on.

Another detail of this satchel is that it came with a magnetic closure so fidgeting to get the buckle closed every time is no longer a problem. The bag's strap is about an inch thick so it's very sturdy. Walking around the city doing errands was pretty comfortable because the satchel is not too big, not heavy at all and with such a comfortable strap, it stayed on my shoulder without budging off.


As for the service, the bag was quickly constructed and sent out. I got mine via Fave8.com. They'll be putting them up for sale soon so I'm really thankful that they gave me this opportunity! Just in time for school! They'll be featuring so many amazing color combinations, featuring neon colors and classic finishes. I think they'll also feature this combination so if you're interested, you better keep your eyes peeled! They were incredibly awesome throughout the whole process. You can check for any updates on their Facebook page. You can also click on the Fave 8 banner I've got set up on my sidebar. It will lead you directly to their website. They have a plethora of really amazing things like The String Republic shoes, Retromarine Italia swimwear for guys and the ever popular Banane Taipeis which I'll also be reviewing soon.

I'm really excited that I gave the satchel trend a try and not just because of the hype, but because these bags really live up to the expectations. It's been love at first sight and I yet have to complain about it. I know this bag will last me a lifetime with the proper care so this is the start of a strong relationship. So all in all, I'm not worried about the trend fading away because if these bags have been around since the sixties, it means they've got the classic formula down. Maybe later I'll do some OOTD pictures but for now, I'll just let this here for you guys to consider your options

Don't forget to "Like" my Facebook page and follow on Tumblr, and Instagram. I'm LilaLane! See you all very soon!

*UPDATE* Fave 8 has partnered with www.leathersatchel.com, where you can get the biggest collection of Leather Satchel Co. bags anywhere and they're ready to ship so no need to wait for your satchel to be made. I've been informed that they work directly with The Leather Satchel Co. and are official distributors of the bags so go check them out! 

Wednesday, August 15, 2012

Hello, NYC!

Hey guys! Wow! It's been so long since I posted, but I hope you can understand. See, I just moved to New York a week ago and I've been settling in to my new surroundings. Seriously, I haven't gotten a break! There's so much to see and do! I've been around the block, back to school, across the bridge, working nonstop... and let me tell you, it feels so darn good to be here! In a way I feel accomplished. Sure, there's plenty I need to still do like get my degree going and working in the business, etc. but moving to NY has always been one of my life goals so finally getting to do so makes me feel like I can do anything. I mean, if thousands of people do it daily, why can't I, right? I just wanted to share with you guys a few pictures and a quick round up of what I've been up to. Most of these pictures are from my phone because since I've been running quite a few errands, I'm not carrying my Canon around that much just to be more swift.


Anyways, I've only been able to see just a tiny bit of the city. I moved to Astoria, Queens so I'll be commuting to my Parsons everyday by train which is in Manhattan. As for my new neighborhood, I'm absolutely in love. I have so many things nearby and it's so tranquil and friendly. 


Little by little I've been getting my things set. I've been sleeping on an air mattress so I'm so stoked I'll be getting my mattress here tomorrow. I'm excited to get my room ready too. It was painted that strange purple color and since I can't afford to change it right now, I'll just stick to it and work with what I've got! Got some storage units put in and everything's fitting in perfectly. 


Yup, that's it! I finally made it! All of my classes will be in the now famous David Schwartz center. I was touristing around Times Square last Wednesday and I decided to go to campus and check out my classrooms. The guard didn't let me pass because this section of the uni closes during the summertime for yes, you guessed it... Project Runway. So I decided to walk out and linger around the benches up front to catch my breath and rest after hours and hours of walking (no wonder people in NY stay fit!) and all of a sudden...


NINA GARCÍA! Yes, she is beautiful! I was so starstruck that I immediately called out her name and when she looked at me, the only thing that came out of my mouth was "You're gorgeous!". She said hi and thanked me for the compliment. She was impeccably dressed and styled. What a way to start off my New York adventure!


Of course, Times Square is just a block away from my campus so I had to do the tourist thing and check it out since I couldn't go last time I came to NYC.


Can you spot me? I'm the one with the Monster Black Banane Taipei! 


The Fashion District! Recognize the Oldenburg?


One of the first stops I HAD to to once I arrived in NY was Inglot. For this, I saved up a few extra dollars. After years and years of wanting to experience the freedom system first hand, I finally got to make my own little palette. Once I test them out a bit more I might do a review on them but for now, I'm pretty much sold on these!


I got 5 eyeshadows and a concealer. Love the magnetic casing. Very nifty and handy!


Also, most of my subway stops have been to Union Square. Loved seeing all the fresh produce and colors at the Farmer's Market! How many radishes and carrots do you think are pilled in there? Wow!


Today was my school's open house so afterwards, I decided to take a stroll and of course, I had walked by tons of times by Lush but never really saw it until today when the sign was turned on. I immediately ran around the block and dashed into the store! I've had Lush products before but I had never been to a shop so it was like a candy shop to me! First thing I did was go in for an Emotional Brilliance reading! Basically, you relax and as soon as the wheel of colors stops spinning, you choose the three colors that call out to you the most. The sales associate will then flip over the tabs and read the significance behind each color's name. What he or she will tell you will be basically something that describes your personality or something that others see in you, admire from you or envy of you. I think my choices are very fitting due to the circumstances I've been in lately and I loved my choices!


I got "Feeling Secure", "Decisive" and "Control". I think these are more than fitting, they're dead on. I didn't purchase any of these because at $22.95 a pop, well... I've seen better quality products for less and they weren't something I really needed so I passed. I did get some other really cool goodies for less than one of these. It was fun to try it out, nonetheless!


The girls at Lush were so amazing, they even threw in two soap samples with my purchase! In the Box I got a Butterball Bath Bomb and a Honey I Washed the Kids Soap. I also got an Eau Roma Water to refresh my face during the day. So stoked to try these out!


Oh yeah! And my roommate took me to The Studio at Webster Hall for a fantastic show. We saw the Denzels! LOVED their music! I had a blast!

Anyways, that's just a quick round up of what's been going on on my first week here in NY. I still have SO MUCH TO SEE! I've been meeting up with friends from around the city, catching up, touristing and visiting my local food joints. The food here is insane. I mean, seriously... woah! I'll be meeting some new acquaintances as well and grabbing some very much needed materials over at Mood soon! Yay! My mom's also sending me my sewing machine soon so I'm so ready for it to arrive here before classes start. Orientation is just next week! 

So all in all, if you're interested in switching backgrounds and moving to NY I suggest you do. I'm in love with this place. I feel like I'm definitely going to test my potential here but I'm ready for that and I have been for a very long time. There's so much to see, hear, taste, feel, do, and experience that I promise you will never be bored. Any of you ever been to NY and never wanted to leave? 

Monday, July 30, 2012

Oh, Darling!


Hi, guys! I've got a review for you all today. I'm pretty excited with this review. Today, I'll be talking about Darling Girl Cosmetics. It's an indie makeup company from Texas. I learned about it from Beauty Bloggers Puerto Rico, one of the blogger groups I'm part of. A fellow member of the group had shared with us about the brand and of course, I had to check it out because by the preview she gave us things looked amazing. In fact, they were!

Image via darlinggirlcosmetics.com

Honestly, I couldn't control my excitement. All the colors were AMAZING. If you're into experimenting with color or simply a little touch of magic here or there, I think there's something for everyone here. One thing I instantly loved were the names of the products. All of them had some sort of pop reference to them, or paid homage to some kick-ass bands (those form part of the Darling Grrl! collection). What a way to win a girl's heart! So, I mad up my mind and the owner, Susan, sent me over some samples to review (samples come in little baggies with 1/8 of a teaspoon of product). In my sample package, I got five eyeshadows, one bronzer/blush and a lipgloss. Susan also included the cutest details in the packaging as well. She threw in a Darling Girl Sticker, her business card and some Hello Kitty confetti!


You can pick between 5oz. or 3oz. of product. For the price, you can't go wrong. The small sizes go for $2.90 and the larger ones for $5.90. The blushes go for 10oz. and 3oz jars and priced equally. The glosses come in 3ml click pens for $5.25. Since Susan is the only one packaging the products, the shipping time goes from two weeks to sixteen days, but that's mostly because most orders are custom and she churns out those orders on her own but I think it was worth the wait. Now, on to the swatches and reviews!


Curious
In the packaging, this has got to be one of the most basic looking colors ever... that is until you open it up! I am definitely getting myself a regular sized portion of this once I move to NY and finish up my sample. Why? It is probably the color I would get most use out of. It is GORGEOUS! It's a tan-ish taupe color with gold and pink shimmer. The application is smooth and longevity is fantastic. I tested it out for the first time for about 5 hours with a shadow base and it looked just as good as it did when I first applied it. Minimum creasing occurred. I also like it for an inner corner highlight. Being as sometimes we might use shadows for other makeup art around our face, it is important to note that this color is not lip safe.


Midnight Sea
Midnight Sea is a lovely purple with blue and turquoise shimmers like a duo chrome. With a good base and primer, it should be able to stick. I don't have the best primer on hand at the moment (Benefit's Stay Don't Stray), but the color was a bit of a hassle to get to properly stick.  As a light wash it can work beautifully but if you want it to really show up, I recommend foiling it. I also used it with NYX's Jumbo Eye Pencil in Milk and it showed up a bit better but not as much as I was expecting. I'm crazy about the color though. Not lip safe.


London Calling
What a brilliant name. You've got to give it to the Clash! When I saw London Calling on Darling Girl's website, I was blown away. It's a navy-ish gray base with red and violet shimmers. When I got it, it reminded me of MAC's Beauty Marked only with a lot more red shift. Once I swatched it I was a bit underwhelmed. When I blended it, I lost much of the shimmer that makes this color so amazing. I'm thinking this color was intended to be used wet as it worked much better when applied as a foil color. It did stain a bit but with eye makeup remover, it was gone completely. This color is not lip safe.


My Little Pony
Come on! How can you not like an eyeshadow named My Little Pony? The name alone got me to picking this one and I'm glad I did. This is one of my favorite ones of the bunch mostly because it is just so darn pretty. I'm not a girl that gravitates towards pink, but when you've got a duo chrome pink that works well anyway you apply it, I'm sold! The shimmer in this shadow leans towards gold, green and pink and it blends beautifully. Loved using this on my inner corners for highlight and against a dark base, it totally transforms any color. This is not a lip safe color.


Roots Radical
When you've got a name that references Rancid, you kind of expect to get something well, rancid looking. This color is far from that. This color is sweet! I usually don't go for greens but I've been experimenting with color lately and gave it a shot. Also, mint is the way to go this summer. I'm thinking this could work well as an eyeliner accent color. The shimmers in this are insane! It has gold and pink shimmers. I had a little trouble getting it to stick but with a better primer it should work nicely. I'm excited to keep playing around with this color!


Here's a look I did using all of the colors. I used Curious as a brow highlight, Midnight Sea on the lid, London Calling in the crease, Roots Radical on the lower eyelid and My Little Pony as the inner corner highlight. For my waterline, I used MAC's Sea and Sky Mineralize Eyeshadow and for liquid liner I used Wet n' Wild's Mega Liner in Black.


Look at all the shimmer! Now, on to the blush and gloss.


Bronze Goddess Blush
I think this one was added as a bonus for my order but one can never refuse a pretty blush. This peachy-tan blush works as a bronzer too. It's an easy application because you've got a two in one product. It wasn't as long lasting as some of the eyeshadows but that varies from formula to formula. I haven't been using a face primer for a while (tsk, tsk, tsk), so maybe with a primer it will work best. The color did show up nicely and gave my face a warm touch.


Liquid Kiss Luxe in Breathe
I was expecting this color to be a bit more opaque than what it really is, but I'm happy with what I got. This is actually a color I'd use everyday because it makes my pale lips look normal, but better at the same time. Breathe is a beautiful berry color with blue and gold shimmers. What really amazed me about this is how long lasting and hydrating it is! I mean, I applied this in the morning and I still feel it on my lips, eight hours later. I'M NOT KIDDING. The color wears off beautifully. I had absolutely no bleeding and the formula is thick but non-sticky. The texture reminds me of Korres' Lip butter and we all know how I love that thing. I think we might have found a very nice alternative. 


All in all, I am incredibly amazed at the quality of these products, the prices and the huge range of colors, especially rare colors, duo chromes and colors with beautiful shifts. Once I get through my samples and move to NY, I will be ordering more colors from Darling Girl Cosmetics. Don't forget to swing by their webpage and "Ooooh!" and "Aaaah!" at all of the goodies! Also, like their Facebook  page  and blogger too! Thanks to Susan at DGC for being such a doll! Anyways, see you guys soon.  I've got lots of packing and organizing to do before I move to NY next week! I'll keep you guys updated!

Sunday, July 22, 2012

Travel essentials (NY edition)- What's in my suitcase?

Travel essentials


So, the final countdown for my liftoff to New York is here. Only two more weeks, and we all know how fast that goes! I've been organizing what I'll be taking with me to New York because when it comes to traveling, the key is to keep everything essential so you don't go overboard with your suitcase weight limit. Nobody likes to pay extra or have to pluck things out of their suitcases at the last minute!

I thought I'd share with you guys some of the pieces I'll be taking to New York so that you can get some ideas on what to take on your future travels. I always tend to overpack, but this time I'm getting down to the basics because after all, I'll be living there so I can go adding some more statement pieces as I go (including a few made by me!). You all know my addiction to black and gold, so it must be no surprise to see this somewhat mono-ish color palette. Of course, you can adapt it to your own taste. This is just what I'll be taking. The pieces shown are not exactly the ones I own, but pretty darn close.

I always start off with some basic tees and blouses. Things you can match up with any bottom or outwear piece. Button down blouses are excellent because you can dress them up or down. I always take with me a structured blazer that has versatility and a little something extra. A few days ago I finally snagged my dream leopard print blazer (just like my idol, Alison Mosshart) at a fantastic sale price at Zara. This is actually what I'll be wearing to on the plane because of its attitude, look and comfort factors and because it can take up some space in my suitcase so I'd rather carry it on myself. Also, I love wearing denim jackets because I can pair them with just about anything, especially a nice maxi dress to tone it down for a cool day. A little black dress is key for traveling because it is probably the most versatile dress ever. You can play it up with great accessories and simply add a nice pump and you're set! I also like to carry some nice knit sweaters just in case the weather calls for it. A few lightweight skirts and I'm ready to go! I like chiffon pieces because the material is airy and takes up no space in the suitcase. A little steaming when you unpack and you're set!

For accessories, it it important to take control because this is one of the things that can overweight your luggage easily. I like to go with maybe two or three really good necklaces, a couple of cocktail rings, a pair of flats, boots, some pumps (not shown) and maybe a pair of sandals if you're the sandal wearing type (not so much me). What handbags you'll take are crucial because you'll be carrying them around all over the place. I'll be taking my Leather Satchel Co. which is the bag I'll be using for school. It's still at the workshop so it'll be arriving soon and it's tricolor and very similar to the palette above so I can use it with practically everything. I'll also be taking my favorite BCBG python print clutch because it is very small and easy to pack and I can use it for special events. For beauty, plan your favorite looks. I find that taking a good eye palette works best (Too Faced Naked Eye palette is my favorite!) and a few lip colors like a good nude, red and pink would suit any look and a good peachy-toned blush is a universally flattering color.

I'll be playing around with this list and maybe adding a few more pieces but basically this is the gist of it all. Remember these key factors:
  • Pack plenty of neutral pieces so you can mix and match because of their versatility.
  • Keep accessories to a minimum so you don't add extra weight to your bag.
  • Pick pieces with materials that are easy to care for so you don't end up walking around with things that need a little maintenance. Cotton pieces are great for that.
  • The little black dress is your best friend.
  • Plan your beauty products so you can take as least possible because this can also add extra weight to your bag.
  • Take a versatile handbag. A neutral colored one is the best way to go. I recommend black or brown. 
  • Pack travel sized beauty product essentials. If you stay for longer, you can always purchase refills when you arrive or run out. 
  • Keep an open mind and have fun!


LinkWithin

Related Posts Plugin for WordPress, Blogger...