Showing posts with label gold. Show all posts

Friday, August 24, 2012

Back to School DIY: More Than Just Your Regular Notebook


Those who know me personally and have taken classes with me know that I have never been satisfied with just regular notebooks when I'm in school. I just can't have the same deal as everyone else. I have to make everything my own! So I always brainstorm during the summer what I'm going to do to my notebooks to make them better than last years'. This year they have to be a bit extra special since I am starting at Parsons and of course, they had to be reflective of who I am and want to be as a designer. Since I don't have any materials whatsoever like I used to back in PR and I have a very limited budget, I was juuuuust about to give in to having regular, plain notebooks until I walked in to my school's nearest Utrecht art supply store and went nuts with their paper section. I took a bookmaking course in college with one of my most esteemed professors and never went back after that. I've been making books and my own paper for a few years now so I really appreciate a fine paper creation when I see one. One of my best books was covered in handmade marbleized nepalese lokta paper so I almost squealed with joy when I saw their HUGE variety as it instantly became one of my favorite materials to work with. Since I posted a picture on Instagram of my notebooks and have gotten a few requests on how to make them, I'll show you a quick tutorial on how I covered my notebooks. Bear with me, the pictures were taken with my phone's camera so they're not the best quality. 
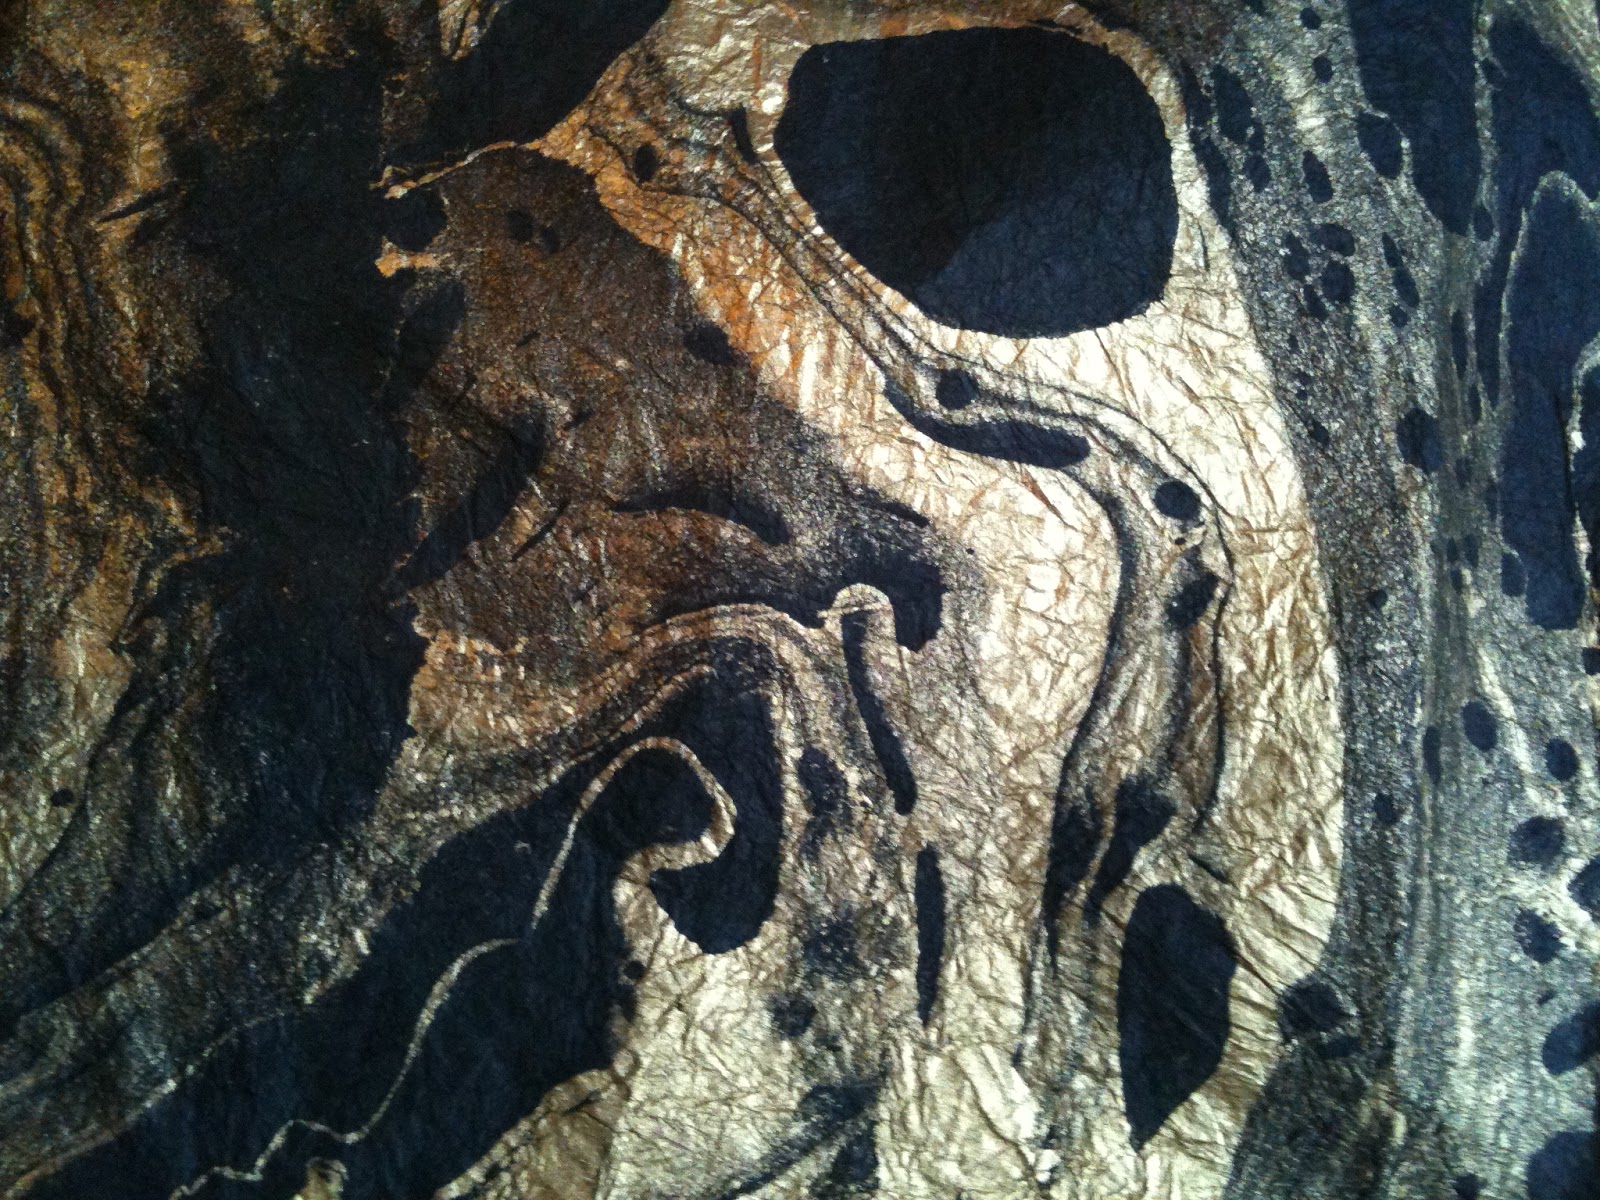
As I mentioned above, I used handmade marbleized nepalese lokta paper, but you can choose any paper you'd like just as long as you don't ruin it when you moisten it. Go crazy! You can use magazines too and make a collage. What I did was basically Mod-Podging this to my notebook. I didn't want to compromise the beautiful texture and quality of the paper by covering it with plastic so I opted for this. Look how gorgeous the texture! One sheet was big enough to cover all seven of my notebooks and it only cost me $4.99.


You'll need:


• Notebook(s)
•Paper to cover notebooks 
• Neutral pH polymer (glue)
•Brush or sponge
•Ruler
•Scissors 
•Pencil 
•Iron (optional)


Step 1: Measure out your notebook and cut out the paper accordingly. I added about half an inch or so on each side just so I can fold in the excess and guarantee that everything will hold and be covered. 


Step 2: With your brush/sponge, apply glue evenly from the center outwards on the cover. It is VERY important that you use a pH neutral adhesive for this so over time, the paper will not suffer from acidity. I found this book making adhesive at Utrecht but one of the best kept secrets is that regular white school glue is basically the toughest thing you can use just as long as you apply some heat afterwards. Just make sure that it's not washable and is neutral. That's where the iron comes in after you've glued the paper on but let's not get ahead of ourselves. You can also use Matte Medium (for painting).


Step 3: Eyeball your paper placement and set it down over the glued cover. Flatten out any air bubbles. Since this paper has such rich texture, I let the wrinkles show. If you're using school glue, this is the moment to put your iron on a low setting and fix the glue with heat. Just gently run the iron over the surface until most moisture is released from the glue.


Step 4: On the reverse side of the cover, dab some glue on the edges and fold in the excess paper. Do the same iron procedure here if you're using school glue.


Step 5: Since my notebook is coil bound, I had to figure out a way to close off that end so I simply cut off the paper in between coils so I could tuck the excess paper un between. I dabbed on some glue and pressed down the tabs in between. The ones on top of the coils I let them on because they looked like fringe and I liked it, but you can cut those off if you like. If your notebook is not coil bound, simply continue the process on the back cover.


Step 6: Apply an even coat of the glue all over so you can seal in the fiber and the paper will last you longer. Doing this might give the paper some sheen, but it will not compromise the quality of the paper entirely and you'll still get the rich texture. Get between the cracks! Let it dry for about ten minutes and voilá! You're done! 


Easy, right? I'm really excited to show these off at school. I encourage you all to try it out. I think the result with this paper is chic, elegant, eye catching and interesting. I know I'm making a big deal out of school notebooks, but just think that you'll be carrying these around all semester long so it's nice to have something pretty to carry around and look at. If you have any questions, please feel free to comment below. I'll be more than happy to help you out! Happy back to school, everybody!

Satchel: Leather Satchel Co. courtesy of  www.Fave8.com 

Monday, May 14, 2012

Linked up! (a Skitch-I-Y Jumbo Clasp Bracelet)

Instagram: LilaLane

I hope you all had a fantastic mother's day weekend! I'm back at my apartment and ready for another Skitch-I-Y. This one actually is about the jumbo sized clasp bracelet I made for my mother. I swear, I've never given such a fantastic gift (well, I probably have but I'm just way too thrilled with this one). Why am I so excited about this one? This DIY can be broken down into 1, 2, 3: One really amazing bracelet for only two dollars in three easy steps. Yes, $2.00. 

I went for a flakie nail polish to my local Sally Beauty Supply last week and stopped by one of the adjacent fabric shops I like to regularly visit. This shop in particular is including supplies for jewelry making lately so I always get really cool thingamajigs. So, in a huge basket of findings and metal work I found these amazing jumbo clasps in black, gold and silver. Each little baggie had right about 5-6 jumbo clasps for just $1.00 each. So I got back home and unloaded my loot on my bed thinking of what to do with this really awesome arsenal of craft goodness. As I started playing around with them it hit me! Of course! Just the clasps alone looked amazing so there was no need to break my head thinking of other ways to show them off! I'm definitely going back later this week to get more supplies to make myself a bunch. 

Each clasp is about 3/4 of an inch and lately I've been obsessed with my vintage jumbo chain necklace so I've been wanting to play around with other jumbo accessories as well. The cool thing about this project is that you can add more clasps and turn it into a necklace. Maybe add chains or even make yourself a pair of  earrings. I know that my mom wants me to make her a whole set!


You'll need:

About 10-11 Jumbo Clasps
Jewelry linking hoops
Jewelry pliers


Step 1: Hook together pairs of the jumbo clasps. You can play around with any combination you like or just keep it simple with one tone clasps. I went for black and gold (of course I did!). About five pairs should be enough for a bracelet. 


Step 2: Start liking pairs with the jewelry hoops with your jewelry pliers and make a long chain of them. I recycled mine from old necklaces I had lying around! 

Step 3: Close off the clasp chain. You don't have to worry about closures because well, the whole bracelet is closures! It's really the quickest and easiest DIY I've ever done.  


And you're done!

See? 1,2, 3... fool proof.


Check out my very awkward hand modeling. Ooooh!


Erm.. somewhat of a mini arm party. (Arm party term adopted from The Man Repeller herself)


Last awkward cut-off arm picture, I promise! But doesn't this bracelet look so adorable?

Try it out and let me see the result! Post it on Instagram and tag me. I'm LilaLane. Don't forget to subscribe to The Fashion Skitch, follow on Tumblr and Like on Facebook


Thursday, May 3, 2012

Skitch-I-Y: Gilded Nails!

Instagram: LilaLane

It's kind of sad to see my turquoise leopard print mani go, but as fantastic as that nail varnish formula turned out (day 5 and STILL NO CHIPPING) the top coat was cracking and I've got a job interview tomorrow so I'm opting for something a little more formal. Well, formal but still me. If you know me well enough, you know about my love affair with gold leaf. I use it on just about everything. Makeup, art work, crafts... you name it! I'm covering it with gold! And this obsession with gold started just a little over six months ago. I used to be an all silver type of girl. So, I got a hold of my gold leaf once more and got nifty with my nails again which is kind of strange because I'm usually the type of girl that avoids getting her nails done because I neglect them after I get over the mani and just let them crumble away. While I'm on a roll, I'm going to take advantage of it.


You'll need:
A base coat of any color of your preference

A glossy top coat

Gold Leaf

A nail file and a cuticle stick


Let's get started!


Step 1: Prep your nails. Apply two coats of your base coat color. I chose Sephora's "Reglisse" because honestly, what better combo than black and gold? It looks utterly classy and elegant. You could really try with any color you wish. I recommend you could also try it with any turquoise, red, white, dark purple or brown colors.


Step 2: Once you apply your second coat of base color, wait until the varnish gets a bit tacky. Tear little pieces of Gold leaf and apply them carefully to the tacky nail color. I like them to look like little gold nuggets. It doesn't have to be perfect. The more irregular, the better! I applied mine only to the tips of my nails. Watch out not to press too hard or you might get your finger prints all over! Make sure you only press over the gold leaf so you don't ruin your base coat. You can get a packet of gold leaf at your local art supply store for about $8-9. 


Step 3: Once you've pressed on the gold leaf, take your nail file and file off the excess leaf off the edge of your nails ever so gently. 


Step 4: You might need to use your cuticle stick to push in any gold leaf that might have creeped onto your cuticles. Clean the area up. 


Step 5: Cover with a good swipe of clear top coat and... 


 You're done!

Sorry for the messy cuticles! I took the picture before I cleaned them up!

Instantly chic nails that will have everyone wondering how you did it! I am loving this very, very easy mani. I'm hoping this will help my outfit for tomorrow's interview rock! Try it out for yourselves! Remember to subscribe to the blog with Google Friend Connect to get updates and to follow me on Instagram! I'm LilaLane.


Monday, October 17, 2011

Hello professional life!

Fashion Internship Interview Attire at Erika Peña


Diane von Fürstenberg bodice dress, $498
Forever21 jacket, $28
ALDO peep toe high heels, $80
Aldo bag, $60
Forever21 spiked necklace, $5.80
Forever21 fish hook earrings, $1.50
Milani Liquif'Eye Metallic Eyeliner Pencil | Walgreens, $6.49
Pocket Rocket Lip Gloss by Urban Decay (Official Site), $20


Hey guys! Guess what? I interviewed today for a fashion internship at Erika Peña and I got it! I start on Wednesday! I'm so excited! Why am I so excited? Well, I'm definitely not excited for my agenda. Poor thing! With my job at Forever 21, this internship, my sewing classes, my gallery expo and the boyfriend... I don't know how I'll have any time for myself anymore! I am excited though because I will get to work behind the scenes in a fashion company, so I'll get to learn how the industry works, what's going on behind the glitz and glamour and what it takes to move along a flourishing business. So, I scrunched up this Polyvore set to show you guys what I wore today. Lately a lot of my friends have come to me for interview suggestions, so I thought I'd make this idea board and share my personal tips and pointers so you can get an idea of what to do and how dress for an interview. I also had a professor in college that was like a mentor to me in all that is personal presentation in the job industry (¡Gracias, Millán!).

OK. The first thing you've got to think of when choosing your outfit for the interview is what kind of company or employer would you potentially be working for. Is it a very reserved and formal company? A more creative one or a very hip and stylish one? That could pretty much set the breaking point for the entire outfit. In this case, I was interviewing for a designer so I had to show that I am indeed very much interested in the latest trends and my personal appearance. Erika Peña's company aesthetic circles around the colors black and gold (a combination which I am very keen on lately) so I decided I should somewhat incorporate that color scheme into my look to catch her eye a bit. I used my go-to little black faux leather sheath dress from BCBG Max Azria (not shown there because I couldn't find it on Polyvore, but check it out here. It's the first one shown. I actually got it on sale for $100 a few months back for my graduation.), and I layered over it a creme colored blazer from Forever 21 that I actually got on sale for $21. I decided to give my look a kick with my Aldo leopard pumps and accessorize with a gold statement necklace and little pyramid stud earrings. The clincher: my new Aldo satchel purse in black and gold which I actually got on sale for $45. Most of these pieces I had laying around in my closet for the longest. I've had those pumps for a good five years already! Classy, timeless, and on a budget.

Based on the type of company you'll dress for, you also have to remember to always give your attire a little personal twist. I did this with my jewelry. Studs and spikes are my thing but I did it in a very classy and toned down way. I also did so with my makeup. When you do your makeup, keep in mind that it can certainly make or break you. Since I was interviewing for a creative and fashionable company, I decided to do my trademark cat eye but give the look a twist with a red lip. I used NYX Matte lipstick in Merlot ( It's not shown there. It's a darker red than the one posted above.) and let me tell you, these lipsticks are TO DIE FOR. They are eternal on your lips, they don't bleed and their color will stay as pungent 4 hours later as they did when you first applied it. I used my new Urban Decay Pocket Rocket lipgloss in Jesse and Milani's Liquifeye Liner in black which is my go-to liner. 

So, here's the run down:
  • Stick to classic color palettes and neutrals with a personal twist on your outfit for any type of interview. If you're going for prints, make sure they're a bit muted and simple. Crazy prints can scream... well, crazy (regardless if you aren't).
  • You can add touches of color with your accessories or one piece of your outfit. Maybe add a bright sleek scarf, a  color block blouse underneath your blazer or a bold color detail on your purse.
  • Keep your makeup clean and simple. Neutral shadows or barely there makeup is the right way to go. Don't experiment with your makeup for these things that day. Stick to what you know and keep those lips classic! Same thing with nails: no neon greens or crazy attachments on your nails, please!  Also, make sure the nail color isn't chipped. That could say you're forgetful and don't pay attention to detail. If it's easier, just keep them in a skin tone color or no color at all. A clear, glossy coat should do.
  • If you're going to go sleeveless, don't use spaghetti straps or expose too much skin. Always make sure it is a wide strap and take any piece that you can use for covering up your shoulders just in case. Blazers are a great way to go. It kind of gives your potential employer a look into ~the future~. A nice, structured cardigan might work too. You never know who'll be interviewing you and their take on style.
  • If you're going to use a dress like I did, make sure it is a reasonable length. A few inches above the knee is fine. If you wear a shorter skirt, a dark stocking could do the job. The trick is to balance your top half with your bottom half or vice versa.
  • Under any circumstance, DO NOT wear jeans to ANY interview. It doesn't matter if it's Saks, Zara, Express or even Panda Express! Jeans scream lazy, tacky and clueless. It doesn't even matter if they're dark wash or black. JUST DON'T. You want to show that you clean up nicely and can manage a polished look. That can be a real deal breaker a lot of times. A nice, clean trouser, skinny or straight legged pant should give you that professional look. You can look like a million dollars with little money! You just have to plan out your attire and be on the look out for great deals. 
  • Another NO-NO: open shoes. I don't think anybody wants to see your feet exposed (eek!). Closed shoes are spot on. A classic pump looks great. The only exception would be a peep toe pump. It's barely showing anything. Keep those piggies well tucked! If you don't want to risk the pain, some flats will do you good. You can play with color with your shoes too!
  • In terms of the actual interview, always practice potential Q&A's before hand. 
  • Always ask the interviewer if it is necessary for you to bring any additional documentation with you. 
  • Research a bit about the company you'll be interviewing with before hand. You never know if any surprise questions related to that might pop up in the interview!
  • Confirm your interview the day before just in case the interviewer has had a change of plans. It also show's you're looking forward to it.
  • Always show up 15 minutes before your interview. It demonstrates that you're incredibly interested, you're punctual, and it could help you out in advance like it has done for me. I've interviewed many times before others and before my appointment because I've arrived earlier, thus helping me snag the job. Don't make a photo-finish entrance on an interview. Don't go ahead and show up an hour early either, just with a few minutes in advance so both you and your interviewer settle in and prepare. 
  • Take a deep breath, relax and go!


I hope those pointers help you guys out in your endeavors for the right job. I know these tips have helped me loads when it comes to job hunting!

LinkWithin

Related Posts Plugin for WordPress, Blogger...