Showing posts with label DIY. Show all posts

Tuesday, September 18, 2012

DIY: Studded Leather Scarf


Bonjour, my friends! Has it really been that long since I posted? Jeebus! School has been getting more and more intense and with my job, and my second job, and this and that... aaah! I decided I needed a break and took some time for myself and my blog, which I feel I have abandoned quite a bit. I have been checking other classmates' blogs and apparently that's something normal when you study at Parsons. *enter sad face here*

Anyways, I've got a quick DIY for you guys. Since I've been away for a bit, I decided I'd treat you guys with an original design of my own. Ever since I first went to Mood for the first time, I've been holding on to an amazing creme leather hide I bought and a packet of studs. Call it my first little splurge at Mood, if you will. I went back and forth thinking of ideas on how to use this deliciously smooth leather. I went from draping it and making a quick skirt to using it on a blazer/coat/thing (so professional!), but I was worried about compromising the irregular qualities of the material which I absolutely loved. I didn't want to loose any of the hide shape and I wanted to show off the material as best I could, so I played around with it for a bit and finally realized that maybe it's just perfect to use it as a scarf. I would do little change to the material and it would be something different as I myself have never seen a leather scarf before. I toyed with the concept of an infinity scarf but again, I'd loose quite a bit of the organic form so I just turned it into a regular panel scarf. 

I decided to name this scarf the Kelly scarf. My dear friend Kelly passed away last week so decided to channel my energy and finally made this to pay homage to her. She was like a mother to me so I'm glad I went with the scarf so she'll keep me warm during my first New York winter! I think she would have liked it very much.

Anyways, let's get started!

You'll Need:


1 Leather hide (Each runs for about 48" X 36" and depending on the size between $30-$45)
Fabric scissors (not the same as paper scissors)
Pins
Ruler or measuring tape
Thread
Studs
Tailor's chalk (not shown here)
Sewing machine or needle


Step 1: Lay down your hide and measure out the center of the piece. Cut irregularly down the center as to mimic the outer border of the hide. You should be left with two long pieces. 


Step 2: On the widest end of each of the panels, with your ruler or measuring tape mark down a line using your tailor's chalk and cut down along the line. It should leave you with two panels with an even border each. 


Step 3: Measure out 3/4" for seam allowance. Mark again with your tailor's chalk and pin down both panels facing right side in (the two soft sode will be facing each other in the fabric sandwich leaving you with both rough side facing outwards). You'll sew along this line. 


Step 4: Prep your needle or sewing machine and sew along the marked line removing needles as you go. Since this is leather, you might want to go slowly with your sewing machine because it's a thicker material. Maybe loosen up the tension between stitches for some smooth sailing. 


Step 5: You should end up with something similar to this. I evened out the edges at the ends of the seam. At this point you could leave it as is but if you want to take it to the next level, stud it! I decided to sew an additional seam on either side of the central seam just to add a bit of interest and have a guide for the studs. Remember to sew rough side facing the machine feed or else it will get stuck on the smooth side! To add the studs, stick them through the fabric and with a butter knife, simply push in the little metal clasps inwards towards the stud cone so they won't bother or scrape you.


And you're done! See? Easy! Isn't that chic? Now, a few pointers you should keep in mind:
  1. Light colored leather does stain with water and your body oils so remember this when you wear yours. If you're like me and like it scruffy and with some wear, by all means go for it! If not I suggest you use a dark colored leather. I'm planning on making this in black too!
  2. The rough side of the leather will shed a bit so don't be surprised if you all of a sudden wind up with little leather bits here and there. I suggest wrapping this up around your neck and keeping it there so it won't go all over the place.
  3. Play around with it! Today in school I used my scarf both wrapped around my neck and simply hung over it with the studs hanging from my back. People thought it was actually part of my creme colored blazer! The studs are a really cool surprise detail so flaunt them!


I suggest you try it out and see! You can can most certainly use other materials, but the simple construction of this definitely calls for leather (in my honest opinion). Remember to follow me on Instagram (LilaLane), "like" my Facebook page for new updates and follow me on Tumblr! Also, feel free to leave any suggestions for posts you'd like to see. I've got a few good suggestions lined up so I'm hoping I can get those rolling some time soon. Until the next time! See you soon! 

Friday, August 24, 2012

Back to School DIY: More Than Just Your Regular Notebook


Those who know me personally and have taken classes with me know that I have never been satisfied with just regular notebooks when I'm in school. I just can't have the same deal as everyone else. I have to make everything my own! So I always brainstorm during the summer what I'm going to do to my notebooks to make them better than last years'. This year they have to be a bit extra special since I am starting at Parsons and of course, they had to be reflective of who I am and want to be as a designer. Since I don't have any materials whatsoever like I used to back in PR and I have a very limited budget, I was juuuuust about to give in to having regular, plain notebooks until I walked in to my school's nearest Utrecht art supply store and went nuts with their paper section. I took a bookmaking course in college with one of my most esteemed professors and never went back after that. I've been making books and my own paper for a few years now so I really appreciate a fine paper creation when I see one. One of my best books was covered in handmade marbleized nepalese lokta paper so I almost squealed with joy when I saw their HUGE variety as it instantly became one of my favorite materials to work with. Since I posted a picture on Instagram of my notebooks and have gotten a few requests on how to make them, I'll show you a quick tutorial on how I covered my notebooks. Bear with me, the pictures were taken with my phone's camera so they're not the best quality. 

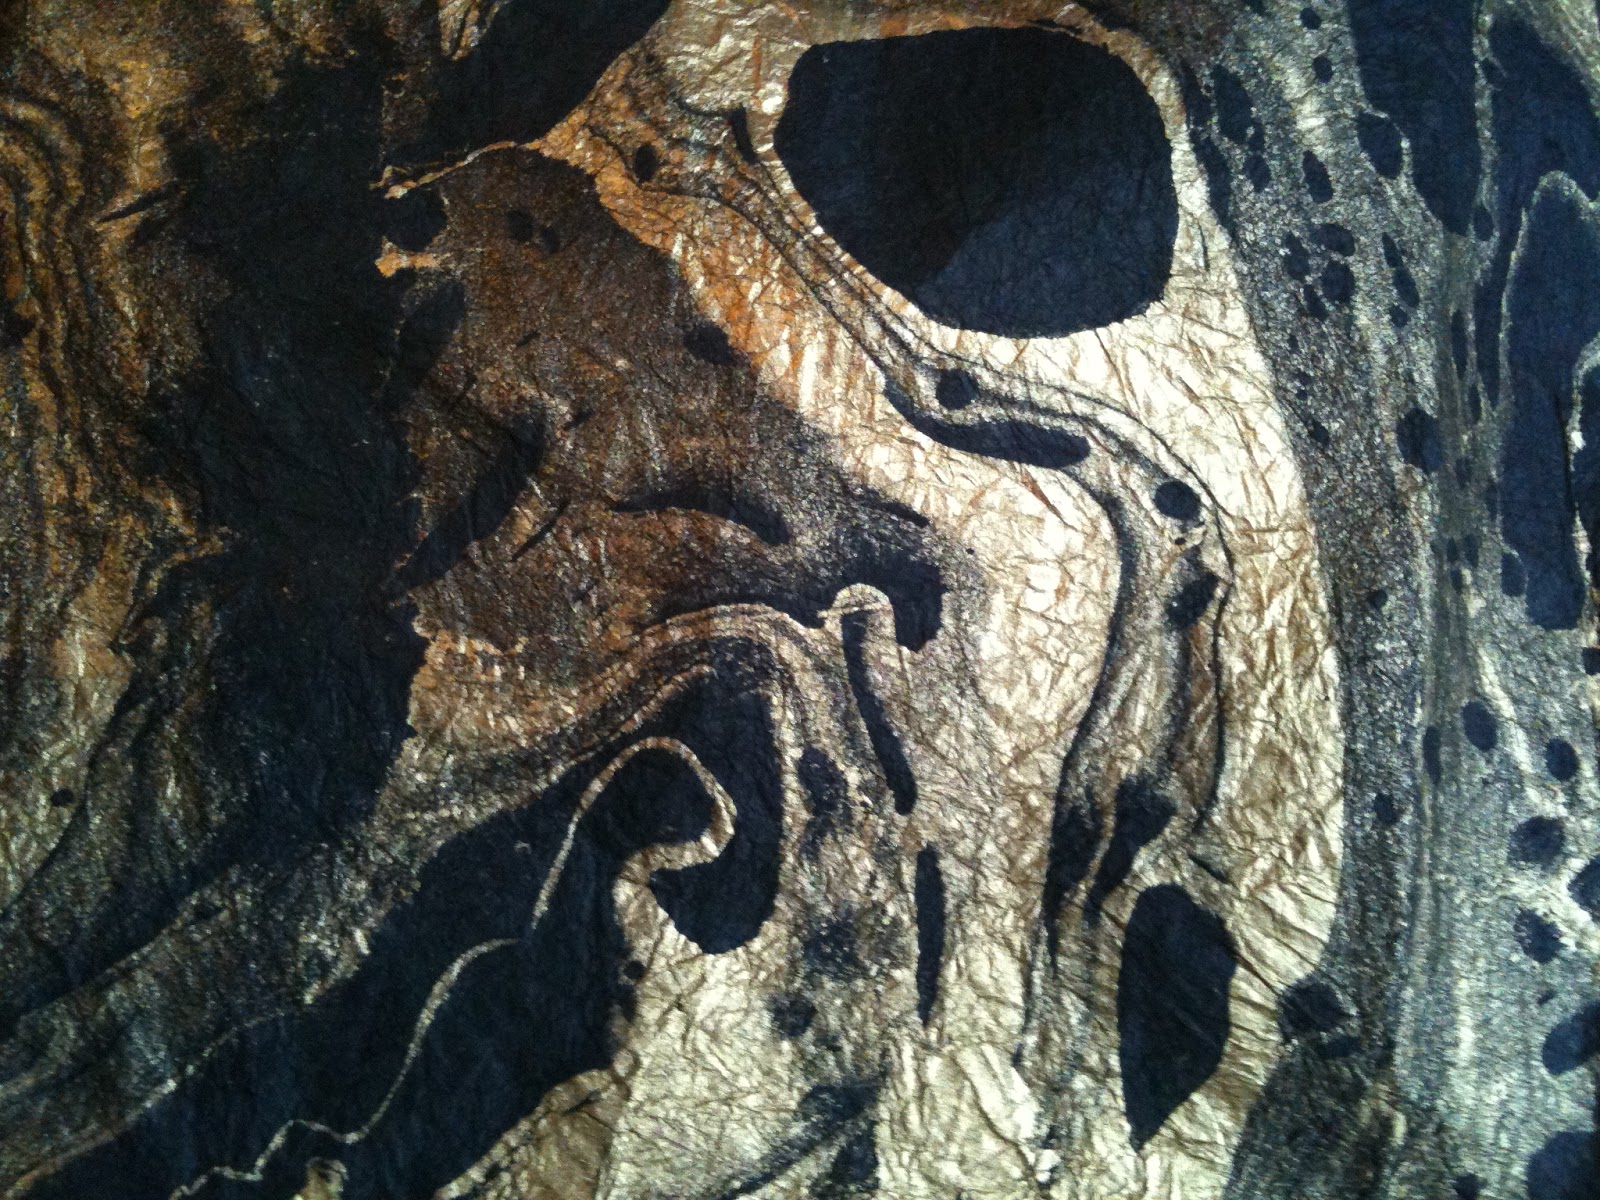
As I mentioned above, I used handmade marbleized nepalese lokta paper, but you can choose any paper you'd like just as long as you don't ruin it when you moisten it. Go crazy! You can use magazines too and make a collage. What I did was basically Mod-Podging this to my notebook. I didn't want to compromise the beautiful texture and quality of the paper by covering it with plastic so I opted for this. Look how gorgeous the texture! One sheet was big enough to cover all seven of my notebooks and it only cost me $4.99.


You'll need:


• Notebook(s)
•Paper to cover notebooks 
• Neutral pH polymer (glue)
•Brush or sponge
•Ruler
•Scissors 
•Pencil 
•Iron (optional)


Step 1: Measure out your notebook and cut out the paper accordingly. I added about half an inch or so on each side just so I can fold in the excess and guarantee that everything will hold and be covered. 


Step 2: With your brush/sponge, apply glue evenly from the center outwards on the cover. It is VERY important that you use a pH neutral adhesive for this so over time, the paper will not suffer from acidity. I found this book making adhesive at Utrecht but one of the best kept secrets is that regular white school glue is basically the toughest thing you can use just as long as you apply some heat afterwards. Just make sure that it's not washable and is neutral. That's where the iron comes in after you've glued the paper on but let's not get ahead of ourselves. You can also use Matte Medium (for painting).


Step 3: Eyeball your paper placement and set it down over the glued cover. Flatten out any air bubbles. Since this paper has such rich texture, I let the wrinkles show. If you're using school glue, this is the moment to put your iron on a low setting and fix the glue with heat. Just gently run the iron over the surface until most moisture is released from the glue.


Step 4: On the reverse side of the cover, dab some glue on the edges and fold in the excess paper. Do the same iron procedure here if you're using school glue.


Step 5: Since my notebook is coil bound, I had to figure out a way to close off that end so I simply cut off the paper in between coils so I could tuck the excess paper un between. I dabbed on some glue and pressed down the tabs in between. The ones on top of the coils I let them on because they looked like fringe and I liked it, but you can cut those off if you like. If your notebook is not coil bound, simply continue the process on the back cover.


Step 6: Apply an even coat of the glue all over so you can seal in the fiber and the paper will last you longer. Doing this might give the paper some sheen, but it will not compromise the quality of the paper entirely and you'll still get the rich texture. Get between the cracks! Let it dry for about ten minutes and voilá! You're done! 


Easy, right? I'm really excited to show these off at school. I encourage you all to try it out. I think the result with this paper is chic, elegant, eye catching and interesting. I know I'm making a big deal out of school notebooks, but just think that you'll be carrying these around all semester long so it's nice to have something pretty to carry around and look at. If you have any questions, please feel free to comment below. I'll be more than happy to help you out! Happy back to school, everybody!

Satchel: Leather Satchel Co. courtesy of  www.Fave8.com 

Thursday, June 7, 2012

Skitch-I-Y: Ombré Nails!


Hi guys! What a week! I've been working on some freelance illustration plus my day job and I promised I'd post as soon as I finished working on that but I'm going to be quite a bit more on it so I decided I'd take a break and post about my first attempt at ombré nails. I am extremely happy with the results and I can't say enough good things about my color choice. LOVE IT! How more cheerful can you get? I've been working on some personal aspects in my life and they're taking quite a good spin so I thought these colors would reflect my positivity. Let's get started!

You'll need: 


  • At least two nail varnish colors of your choice.
  • Base coat
  • Top coat
  • Beauty sponge
  • Q-tips
  • Nail Polish remover
  • water 


Step 1: Prep and apply a base coat to your nails. I've been using Bettina's Stick It Base Coat for a while now and I am loving how good it is! I've had my ombré for about three almost four days and not a single bit of chipping so far. NOTHING. Usually I would already be re-touching since my nails are so brittle. And the price was another clincher for me. Under $5! 


Step 2: After your base coat dries, apply two coats of your first color of choice. I went for my new polish obsession: Bettina's Green Apple. I've already used it in three consecutive manis, including a splatter nail, or how I like to call it, a "Jackson Pollock nail". You can see it here. Let me know if you'd like a tutorial on that!  The only downside is that it's a potent color. Pretty much changes any other color layered over it as you may see on this tutorial.


Step 3: After your base color has dried, take your sponge and dip it in water. Wring out the excess water. It should be moist but not too dry or else the color won't transfer smoothly. Practice makes perfect here. Take your sponge and dip it in your other color or brush some polish onto the sponge. I prefer swiping the brush on the sponge to prevent the polish from drying. 


Step 4: Start dabbing your colored sponge over the area you want to ombré little by little. You might need to be patient to achieve your desired tone as the sponge might absorb the color. Work it gradually until you've got no visible lines and your color is even. If necessary, clean off your edges with some nail polish remover and a q-tip.


After it dries, apply a good coat or two or top coat and you're done! Instead of a glossy coat, I decided to go matte to give this bright, summer nail an extra umph! I used NYC's Matte Me Crazy. I like it! No chipping so far. A little inner cracking but it's to be expected at this point and it only cost me $2.19. Yes!


If you try out the ombré nail, show me! Experiment with colors, textures and tones. You can link me in the comments below, post on my Facebook page or tag me on Instagram! I'm LilaLane. See you soon with a few more DIY's, beauty and fashion posts I've got lined up. Hopefully I can get them all done before I move to NY! 

Wednesday, May 23, 2012

Skitch-I-Y: Tribal Bib Necklace


If you read my Mother's Day post, you might remember me mentioning Jenni Radosevich from I Spy DIY and her really cool projects. Well, my absolute favorite DIY from hers has got to be her tribal necklace and of course, it brought me back to jr. high school when I was the girl that braided with thread all the other girls' hairs and sold friendship bracelets for pocket change so I could score awesome goodies at the candy shop across the street from my school. In other words, I HAD TO TRY IT OUT! I always like to try things a little different than shown so I played around with colors, lengths and amounts. I also used some different materials as Jenni because I couldn't find bungee cord but I actually love the results with what I used. It's also lighter and cheaper. The cool thing about this is that you can make practically anything with it. You can keep it simple and make a bracelet like Jenni does as well, or you could even make a belt! It's really the most simple form of friendship bracelet but taken to the next level. I wanted to play around with neons since they're the hot ticket this spring/summer, and I made one for my mom's birthday. I kept hers smaller and neutral as she's petite and wouldn't wear neon like me. Anyways, let's begin (image heavy post ahead)!


You'll need:


  • Assorted colored threads and/or nylon twine
  • Cotton Clothesline or bungee cord
  • Scissors
  • Beads (optional)
  • Masking tape (not shown)
  • Glue (UHU, Magnatac- not shown)


Step 1: Take the cotton clothesline and measure out the desired length. It all depends on how you want to do your necklace. If you want it single then you can cut as long or short as you wish. If you're going to do a bib necklace like me, I recommend cutting one long strand of about 30"(so you could wear it of the length of your liking) and the rest is up to you. My initial tube was of 9" so it would fall nicely on my decolleté. For each tube you will use three clothesline cords. For the first one you will cut the 30" one and two shorter ones aligned in the center of the long one. For the rest you will cut them all the same size of your preference. Secure the ends with masking tape so they wont unravel. You can add some tape to keep the tubes steady and remove them later on as you go wrapping the thread.


You should have something similar to this:


Step 2: Take your colored thread of preference and tie a half knot at the end of each tube (for the tube with the long cord, you will start where the short ones begin). Make sure it is really taut so it wont loosen up. If you prefer to make another half knot, then go ahead. Do not cut your thread just yet!

Step 3: Tuck in the extra thread in between the cotton cords and start wrapping your thread by the end that you haven't cut yet. Make sure it is even and really tight or you'll get peekaboo spaces. Wrap as much as you like. You can add small beads if you wish as you go wrapping it around but for that you would have to cut your thread before the aforementioned time so you could string them through. I chose to keep mine simple as the neon colors were enough detail for me.

Step 4: If you wish to change thread colors, simply make a half knot with your old color and tuck in the excess in the cotton cords. 


Step 5: Repeat the same process until you cover the entire tube of cords. You can change colors as often as you like.


Step 6: When you reach the other end, wrap a double knot to hold in in place. Cut off the excess and secure it with a drop of glue. Also, don't forget to wrap some thread to the cords that you'll use to tie the necklace to your neck so they wont unravel!


At this point you could finish it off with just one tube or make it a bracelet by doing it shorter. If you want to learn how I did mine, keep reading.


Step 7: Make as many tubes as you wish and the length that you like. I cut mine in a degradé so they would go from largest to smallest. 


Step 8: Align your tubes and secure them in the center with a band of tape. This will make the weaving much easier to manage. The weaving will be diagonally as the arrows point out. The more diagonal inwards, the more closed the necklace will be (you can see the difference between both necklaces above). 


Step 9: Here I have shown it separated from the pack for your better viewing. You will take the first or last tube and tie some thread. Secure it with a droplet of glue. Make sure the knot is facing the backside of the other tube and is not exposed. We want this to look as neat as possible.


Step 10: Start interlacing the thread over and under successively until you reach the other end and back. Pull the thread taut, cut off the excess and secure at the end with a discreet knot. Put a dab of glue. Do this as many times you wish making sure it looks neat. Do this along the length of the necklace until you reach the outer ends. I did it about every inch or so (where the shortest tube ended successively).


And you're done!


I am seriously over the moon with how these turned out! I think I'll make myself many more in all the colors available! This statement necklace is fun and bright and well... just pretty darn bold! I wore mine out today to work and at the post office, people actually stopped my to ask me where I got it! They couldn't believe it when I told them I'd made it. It took me about 4 hours to make the big one and just a one hour for the smaller one. This is a necklace that must definitely be worn with a simple outfit, as it says so much on its own. You really wouldn't want to steal its thunder. If you're going neon, wear it with neutrals for the extra pop! Now, oblig fashionista picture~~~~


If you'd like to know about my makeup, for my eyes I used Wet n' Wild's Mega Liner in Black (best liquid liner ever), Estée Lauder's Roseberry, Ben Nye's Red eyeshadow, Nars Desire blush, Makeup Forever's Star Powder in 44, Nyx Jumbo Eye Pencil in Milk, Milani's Liquif'eye Liner in Black and Benefit's Bad Gal Lash mascara. Nars Casino bronzer for contour and for my lips I went full blown Sephora's Hot Hues lip balm in Crazy Coral.

Swing by I Spy DIY for more amazing DIY ideas! I myself am obsessed! Don't forget to check out my Facebook page and Like to stay posted on daily updates, follow me on Tumblr and also on Instagram! I'm LilaLane. Feel free to tag me or post on my Facebook wall your own tribal creations!

Also, I really want to thank you all for your support! I'm more than humbled by the amazing feedback I've been getting from you all. I'm more than open to any suggestions and requests on how I can improve my blog because after all, the biggest joy I get from blogging is seeing you guys enjoy my posts, appreciate them and try them out. Thank you all so much and help me spread The Fashion Skitch joy! Share away! So many more goodies to come!

Sunday, May 20, 2012

Skitch-I-Y: Striped Tape Nails!

Instagram LilaLane

I swear, I think I'm obsessed with painting my nails which is funny because I used to avoid doing them as much possible. I've been trying so many different techniques lately. It's like I've rediscovered nail art again. Between the day before yesterday and yesterday, I've re-done my nails three times. As of the moment I'm trying to master the water marbling technique. Not as easy as it looks, but when you get it, it's really neat! While I conquer that, I'll show you guys a really easy technique that has endless possibilities. Like in art, with nails it's all about techniques and how you apply them. I'm sorry I don't have a better picture other than the one I posted on Instagram, but I sometimes forget I have a camera (derp!). Anyways, this picture shows you how well the technique works. Let's get started!


You'll need:

At least two different colored polishes
Tape
Clear top coat
Base coat


Step 1: Prep and prime your nails. I really suggest you do use a base coat for this as you will be working with tape and it might pull off the base color if not prepped correctly. I recommend CND's Stickey. Color your nails with the base color of your choice. I went for black with Sephora's "Reglisse". 


Step 2: After your base color has COMPLETELY dried, cut some strips of tape and layer them over your nails as you wish. Wherever you have put your tape is where your base color will peek through. I used masking tape for mine but any tape should do as long as it is well pressed in place. Make sure you don't leave any corners of the tape unadhered or the polish will seep in through there. You want to make sure you get crisp lines.


Step 3: Cover the unmasked areas with another color of your choice. I used Sally Hansen's Hard as Nails Xtreme Wear in Celeb City. 


Step 4: Remove the tape very carefully and slowly. Don't wait until it dries out or you will ruin your work. I usually wait about 30 seconds after I paint them to do that. When you remove it, you will have your striped pattern. Retouch if necessary. 


Step 5: Wait until it dries completely and add a good top coat. 


And you're done!

This is a really easy technique that you can definitely experiment with. Play with different color combinations or mask off really intricate tape patterns. You can also mask off the base of your nails with band-aids to get half moon effects. The possibilities are endless! I love how mine turned out. They kind of remind me of little Sephora bags. As for my nail art obsession, well... it's bordering on insane! Here's some of the marbling I've been able to achieve:


If you guys would like a tutorial on this (or at least a run through of my experience with it), let me know in the comments or via Facebook. I'd love to see if you tried the technique so don't be afraid to post in the comments below, my Facebook wall or tag me on Instagram. Don't forget to Like and also follow on Tumblr and Instagram. I'm LilaLane!   


LinkWithin

Related Posts Plugin for WordPress, Blogger...