Thursday, May 3, 2012

Skitch-I-Y: Gilded Nails!

Instagram: LilaLane

It's kind of sad to see my turquoise leopard print mani go, but as fantastic as that nail varnish formula turned out (day 5 and STILL NO CHIPPING) the top coat was cracking and I've got a job interview tomorrow so I'm opting for something a little more formal. Well, formal but still me. If you know me well enough, you know about my love affair with gold leaf. I use it on just about everything. Makeup, art work, crafts... you name it! I'm covering it with gold! And this obsession with gold started just a little over six months ago. I used to be an all silver type of girl. So, I got a hold of my gold leaf once more and got nifty with my nails again which is kind of strange because I'm usually the type of girl that avoids getting her nails done because I neglect them after I get over the mani and just let them crumble away. While I'm on a roll, I'm going to take advantage of it.


You'll need:
A base coat of any color of your preference

A glossy top coat

Gold Leaf

A nail file and a cuticle stick


Let's get started!


Step 1: Prep your nails. Apply two coats of your base coat color. I chose Sephora's "Reglisse" because honestly, what better combo than black and gold? It looks utterly classy and elegant. You could really try with any color you wish. I recommend you could also try it with any turquoise, red, white, dark purple or brown colors.


Step 2: Once you apply your second coat of base color, wait until the varnish gets a bit tacky. Tear little pieces of Gold leaf and apply them carefully to the tacky nail color. I like them to look like little gold nuggets. It doesn't have to be perfect. The more irregular, the better! I applied mine only to the tips of my nails. Watch out not to press too hard or you might get your finger prints all over! Make sure you only press over the gold leaf so you don't ruin your base coat. You can get a packet of gold leaf at your local art supply store for about $8-9. 


Step 3: Once you've pressed on the gold leaf, take your nail file and file off the excess leaf off the edge of your nails ever so gently. 


Step 4: You might need to use your cuticle stick to push in any gold leaf that might have creeped onto your cuticles. Clean the area up. 


Step 5: Cover with a good swipe of clear top coat and... 


 You're done!

Sorry for the messy cuticles! I took the picture before I cleaned them up!

Instantly chic nails that will have everyone wondering how you did it! I am loving this very, very easy mani. I'm hoping this will help my outfit for tomorrow's interview rock! Try it out for yourselves! Remember to subscribe to the blog with Google Friend Connect to get updates and to follow me on Instagram! I'm LilaLane.


Wednesday, May 2, 2012

Skitch-I-Y: Animal Print Nails!

Instagram: LilaLane

So, I posted a few days ago an animal print nail art I did on my nails on my Instagram and I've been getting a few requests on how to make it. I think it's cheaper than getting those nail art stickies I've seen around (unless you found them for $0.25 on clearance at your nearest Walgreens like I did. Then you can splurge on a bunch of them!). I think the best part of this nail art is that both of your hands will turn out neat! I mean, don't you hate it when you paint your nails on one hand really nice and the other hand just looks like a hot mess because you don't have the same motor skills with the other? Since this is just random splatters of paint, I'll assure you you'll be satisfied with both.

You'll need:

  • Two nail varnishes of similar hues. Make sure one is darker than the other. If you want to be a little more playful, you can use different colors just as long as they're contrasting.
  • A nail art pen or a thin brushed varnish in black. I got these Kiss Nail Artist Fine Art Pens on Clearance at Walgreens for only $2! The pack brought this black color and a silver one.
  • Clear top coat


Step 1: After prepping your nails, coat them with two coats of the lightest color. For mine I used Wet n'Wild's "I Need a Refresh-mint". It's a beautiful turquoise color similar to Tiffany Blue. I am absolutely loving this new formula they came out with. I've had this nail art now for about 4 days and STILL NO CHIPPING. The formula is a bit thicker but it glides on smoothly and opaque in just two coats. Also, the brush is wider so you get more coverage in just one swipe. 


Step 2: After making sure your base color is completely dry, paint on some random spots all over the nail. They don't have to be perfect circles. The more irregular, the more close to animal print they will look. Make sure the brush isn't loaded with varnish. Remove the excess before applying it to your nail or else you will get huge pools of polish that will never dry up and will be a mess. I used Bettina's "Art Deco Aqua". 


Step 3: Once your dots are completely dry, take your nail art pen and dot along the corners of your turquoise spots. I like to add about 2-3 big splotches of black around each one and make some smaller random ones along the blank spaces of the nail to simulate the animal print best. 


Step 4: Cover your nails with a final swipe of top coat and you're done! If you use these nail art pens, it is a must that you use top coat as they will fade away with wear. Once they're coated, they wont go anywhere. My favorite is Bettina's Glossy Top Coat.


And there you go!

Now you've got a super fun and chic way to play up the color on your nails. You can try out different color combinations and they're a perfect mani for any occasion. Remember to subscribe to the blog for updates and follow me on Instagram! I'm LilaLane.

Sorry for the crappy quality, it's from my phone!

Tuesday, May 1, 2012

Skitch-I-Y: Turban Head Wraps (Anna Sui s/s 2012 inspired)

Anna Sui
Marc Jacobs

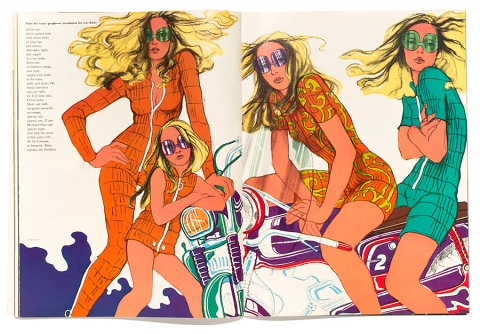
Turbans made quite an appearance during a few runway shows for spring/summer 2012. The girls at Anna Sui flaunted them like it was the seventies à la Antonio López. Marc Jacobs' models donned them too in a more sportswear vibe. I think this is a really chic accessory perfect for the summer time. It can glam up any look to give an exotic feel to your outfit.  These are really easy to make.  I'll show you how to make a really well made turban head wrap that will last your for seasons to come. After all, it is a classic and we all know how I feel about classic pieces.


You'll Need:


  • About 1/4 of a yard of stretch fabric. I recommend lycra or any stretchy cotton fabric. You could use any old t-shirt and recycle it. 
  • Thread
  • Scissors
  • Measuring tape
  • Pins
  • Needle or a sewing machine
  • Fabric chalk (not shown)
  • Embellishments (optional)


Step 1: Fold your quarter of a yard in half and cut out two 8" x 24" rectangles. 


Step 2: Fold your rectangles in half. If your fabric has a print, make sure the print is on the inside of the folded piece. With your fabric chalk, mark off 5/8" for your seam.


Step 3: Sew along the line. You should also sew along one of the shorter sides to shut off the opening. 


Step 4: Invert your sewn pieces so the seam allowance is in the interior of each fabric tube. 


Step 5: Grab both tubes and interlace them by the center as if two V's were crossed. 


Step 6: Take one of the open endings and push the edges inwards. Then take both endings from the opposite side of the head wrap and stuff them inside neatly. Make sure everything's flat.


Step 7: Take the remaining ending (the one that is sewed shut) and align it behind the stuffed ending. Sew along the center of the bunch to secure all four endings in place. 


Step 8
: Cut off any excess thread and you're done! You can add any embellishments if you wish. I always keep a lot of beads, feathers and pins and miscellaneous pieces on hand for projects like this. 


You can wear this with practically any outfit. I invited a friend along so I could show you guys how you could style your outfits accordingly with your turban head wraps. You could wear these for the daytime, for any casual look, for special occasions and even to work!


Go casual!


For this look we went for something really casual and relaxed. Docs are one of our fave must do's for all times. Pair them with a skirt for an edgy look. They're always fun and perfect for the summer heat. We kept the turban simple to keep the look easy. I added my favorite vintage belt from the 80's that I love to use as an oversized chain necklace from Ouna's Closet and my Ulan ring from Erika Peña.


Sultry, yet simple

Here we went for a more dressy look. Maybe for a nice night out in town. A beautiful white, sleek dress is the perfect backdrop for a bronze colored turban. A statement bracelet completes this look. You can play up this look with a nice pump or maybe be grecian inspired with some pretty sandals. 


Resort chic


For this we wanted to play on the whimsy of the turban. What better look to play up than resort? It's summer time and that's what it's all about. I wore my favorite dress. It's an animal print maxi that is just about the flowiest thing I own. I also got it for only $20 at Marshalls. I accessorized with Erika Peña Abebi earrings, Moni necklace and José María ring (courtesy of Ivonne). I also added my new linking cuff bracelet from Electroshock. Just to show you guys how the turban looks with embellishments, I added this old gold leaf pin I had lying around. I probably wouldn't add it being as I'm already using so many accessories, but it's just so you guys can get an idea. It looks very chic!


Girl on the go!


For this look, it was essential to maintain everything easy and transitional.  Pair your accessories accordingly and you can go from work to casual date night in no time. Some nice jeans and a cute peplum blouse are a quick way to look chic. Don your turban head wrap and a streamline envelope clutch and you're set! 


Try out your own turban head wrap for the summer. It's a great way to make use of your old t-shirts  and adds a really cool touch to any outfit!  


Monday, April 23, 2012

Here's the Skitch: Anna Sui s/s 2012


For those who have known me for years, it's no surprise that every once in a while I like to toss aside my usual fashion taste for a bit and like to unlatch my belts and trade them for loose fitting pieces, dip dye my monotone wardrobe into somewhat summery prints and trade my favorite black pants for flowy skirts. It's a very rare sight, but not impossible to imagine. After all, I live in a tropical island where the temperatures get kind of ridiculous sometimes and although I am one for sticking to my personal style no matter the inclement conditions, I can't help but switch that up every once in a while. Enter one of my all time favorite boho-chic designers: Anna Sui.

For s/s RTW 2012, she gifted us with an inspiring flashback via Puerto Rican fashion illustrator Antonio López (proud to say he's from Utuado, Puerto Rico, same place my grandmother is from!) to the early 70's. What I adore about her designs is that no matter how much her prints and styling blast you to the past, her cutting and construction is relevant to any moment in time and any woman can wear them flatteringly. Crépe de chine and chiffon flowed freely. They're effortless pieces yet modern while maintaining a vintage quirk some designers try to achieve but fail to do so as swimmingly as Sui does. Her pieces can be easily styled and it's a look that can carry on for years and years. I mean, you can get an Anna Sui piece from five years ago ans it'll still be as relevant as the next season.

As you all may have read before on my Pucci Skitch post, I'm not huge on prints but there's something about Anna's prints that always warm my heart. Whether it be little hearts or bold paisleys, her prints are some of my few faves. Also, her accessorizing is sweet. Turbans for summer? YES! What more summery, chic and fabulous than that? Sandals with socks? Well, maybe I'll skip on that but it's definitely a style that a lot of girls can carry if done correctly. It's all brightly spirited. I know that whenever the summer bug hits me, I'll always reach out to Sui for inspiration!


Photos via
Style.com, Models.com,
http://wewastetime.wordpress.com/2011/11/28/antonio-lopez/

Thursday, April 19, 2012

Skitch-I-Y: Naturally lighten your hair!

I know I've hopped on the beauty bandwagon quite a bit lately but I'm a sucker for all things personal care. I'll get back to fashion in a bit. In the meantime...


Quite a while back I stumbled upon a DIY video by Andrea's Choice on You Tube on how to lighten your hair with natural, household ingredients. I've been meaning to change up my hair for quite some time now but since my hair grows so slowly (it took me two years to grow out the last color change I did to it!), I've been quite afraid of doing anything drastic. Also, it's cheap! For under $10 you can get similar results to what a $50+ appointment would be at the salon. I mean, this was a trip to my kitchen and back! Sure, the process takes a bit more than a trip to the beauty salon would, but if you're like me and would prefer to see a gradual process and have the option of stopping then here's what you'll need to do:

The MVP of this process is honey. As Andrea explains, it has small traces of peroxide (yes, that thing your mom and aunt used to lighten her hair with when she was your age) that will gradually lighten your hair unlike the harsh effects of bleaching. So do keep in mind that this will take some time. I have quite greasy hair so I tend to wash my hair every other day. Whenever I'd wash my hair, I'd slather on the honey mask a while before getting in the shower. I did the conditioner and honey mask (1 part honey, 2 parts conditioner). You can also do it with honey, olive oil and maybe half of a banana but I found it was easier to do the honey/conditioner treatment and I didn't want to add more oil to my already grease-prone hair.  I'd slather it on, wrap my hair in a plastic bag, let it process for about 30-40 minutes, wash off and dry.


Now, Andrea explains that you'll start noticing your hair lighten right about at the fourth or fifth try, but I started seeing changes immediately. I was shocked when I rinsed my hair after the first try. It wasn't much, but there was definitely some change! I just finished my fourth mask and I couldn't wait to share it with you guys because this stuff really works. The more you do it, the more it will lighten up so I think it works really nice for the upcoming summertime. It's nothing too extreme but just the right amount of change. Heck, I think this might even work for girls that are still into subtle, ombré tips.

Here's my progress. Every time I did a honey mask I took pictures of the result.They were all taken in my bathroom with the same flash, aperture and velocity so you could notice the difference under the same lighting conditions. Sorry if some are a bit blurry but I always forget to charge my camera and I tend to take these pictures a bit rushed.

1st Mask


2nd Mask

3rd Mask

4th Mask
As you can see, the results are quite surprising for something that is as easy as going into your pantry and applying it to your hair. I'm going to keep on working with this until I get to a desired tonality. Maybe I'll even try out the demure ombré tips. Maybe. Also, go check out Andrea's You Tube channel. She's pretty darn awesome!

Sunday, April 15, 2012

The Skitch: Spring Makeup Trends

Leave it to me to wear a dark palette on my wardrobe all year long. How do I occasionally experiment with color? My makeup! Here's where I go crazy literally every chance I get. If there's always something I look forward to in the morning it's deciding my look of the day. I'm quite excited about some of the makeup trends for this spring because they truly are right up my alley. It's all about playing up the eyes or lips. 

I present you all with my new face chart model. I like to call her Lila. 


Neon lights

Play up your peepers with an extra bold color for that edge your look might be missing. If you're not into sporting bright colored accessories, a touch of neon for spring on your makeup might be just what you need so try out a bold aqua or pink on your lids or lips! It might be a bugger to find neon colors in the US because the FDA doesn't approve of them (booo!), but by simply adding a white base to any bright eyeshadow, the color will instantly pop! Try out NYX's Jumbo Eye Pencil in Milk or and always remember to prime your lids for extra payoff!


Bold blue

I'm really excited for this trend because it's one of the few that will actually carry on to fall. If you saw Prabal Gurung's f/w 2012 show the models sported a striking blue lid. Blue tones are also fantastic for brown colored eyes. They're complimentary colors so it's a given that your eyes will go from boring to amazing! Practice out many different looks with blue colored shadows. But take it easy, blue shadow can be messy and your look can go haywire! Just remember to play it up gradually. Maybe start out with a nice eyeliner or a navy smokey eye. You can also play with your mascara color. 


Neutral brown and a pop of poppy!

Neutrals are always in and how about taking that smokey eye and softening it up for the spring? Grab your brown colored shadows and blend all along the lids for a soft, yet sultry look. Rub on a nice, peachy color on the apples of your cheeks and play up the look with a bright coral color or a classic red lip! If you're not into a bright lip, keep your lips toned down with a nude color and maybe a swipe of gloss.


Wing it!

I believe there is one look that is absolutely fool-proof and timeless: the winged eye! Absolutely no other look is as flawless as this on is in my book. Whether you like to get your done with pencil, gel or liquid liner, it's a look that'll lift any eye. It takes a little practice mastering the wing, but I promise that once you've got it down, it's a makeup look you'll want to wear almost every day. Play it up with a bright coral, red or pink lip and you're out the door in 1, 2, 3! You can even add some false lashes for that extra va-va-voom!


I'm really excited for these makeup trends this spring and they're all looks that can be easily transformed for any outfit, occasion and season. They're playful, exciting and easy to achieve. What are your favorite spring makeup trends? 


Reserved Rights Desirée V. 2012


LinkWithin

Related Posts Plugin for WordPress, Blogger...