Monday, July 30, 2012

Oh, Darling!


Hi, guys! I've got a review for you all today. I'm pretty excited with this review. Today, I'll be talking about Darling Girl Cosmetics. It's an indie makeup company from Texas. I learned about it from Beauty Bloggers Puerto Rico, one of the blogger groups I'm part of. A fellow member of the group had shared with us about the brand and of course, I had to check it out because by the preview she gave us things looked amazing. In fact, they were!

Image via darlinggirlcosmetics.com

Honestly, I couldn't control my excitement. All the colors were AMAZING. If you're into experimenting with color or simply a little touch of magic here or there, I think there's something for everyone here. One thing I instantly loved were the names of the products. All of them had some sort of pop reference to them, or paid homage to some kick-ass bands (those form part of the Darling Grrl! collection). What a way to win a girl's heart! So, I mad up my mind and the owner, Susan, sent me over some samples to review (samples come in little baggies with 1/8 of a teaspoon of product). In my sample package, I got five eyeshadows, one bronzer/blush and a lipgloss. Susan also included the cutest details in the packaging as well. She threw in a Darling Girl Sticker, her business card and some Hello Kitty confetti!


You can pick between 5oz. or 3oz. of product. For the price, you can't go wrong. The small sizes go for $2.90 and the larger ones for $5.90. The blushes go for 10oz. and 3oz jars and priced equally. The glosses come in 3ml click pens for $5.25. Since Susan is the only one packaging the products, the shipping time goes from two weeks to sixteen days, but that's mostly because most orders are custom and she churns out those orders on her own but I think it was worth the wait. Now, on to the swatches and reviews!


Curious
In the packaging, this has got to be one of the most basic looking colors ever... that is until you open it up! I am definitely getting myself a regular sized portion of this once I move to NY and finish up my sample. Why? It is probably the color I would get most use out of. It is GORGEOUS! It's a tan-ish taupe color with gold and pink shimmer. The application is smooth and longevity is fantastic. I tested it out for the first time for about 5 hours with a shadow base and it looked just as good as it did when I first applied it. Minimum creasing occurred. I also like it for an inner corner highlight. Being as sometimes we might use shadows for other makeup art around our face, it is important to note that this color is not lip safe.


Midnight Sea
Midnight Sea is a lovely purple with blue and turquoise shimmers like a duo chrome. With a good base and primer, it should be able to stick. I don't have the best primer on hand at the moment (Benefit's Stay Don't Stray), but the color was a bit of a hassle to get to properly stick.  As a light wash it can work beautifully but if you want it to really show up, I recommend foiling it. I also used it with NYX's Jumbo Eye Pencil in Milk and it showed up a bit better but not as much as I was expecting. I'm crazy about the color though. Not lip safe.


London Calling
What a brilliant name. You've got to give it to the Clash! When I saw London Calling on Darling Girl's website, I was blown away. It's a navy-ish gray base with red and violet shimmers. When I got it, it reminded me of MAC's Beauty Marked only with a lot more red shift. Once I swatched it I was a bit underwhelmed. When I blended it, I lost much of the shimmer that makes this color so amazing. I'm thinking this color was intended to be used wet as it worked much better when applied as a foil color. It did stain a bit but with eye makeup remover, it was gone completely. This color is not lip safe.


My Little Pony
Come on! How can you not like an eyeshadow named My Little Pony? The name alone got me to picking this one and I'm glad I did. This is one of my favorite ones of the bunch mostly because it is just so darn pretty. I'm not a girl that gravitates towards pink, but when you've got a duo chrome pink that works well anyway you apply it, I'm sold! The shimmer in this shadow leans towards gold, green and pink and it blends beautifully. Loved using this on my inner corners for highlight and against a dark base, it totally transforms any color. This is not a lip safe color.


Roots Radical
When you've got a name that references Rancid, you kind of expect to get something well, rancid looking. This color is far from that. This color is sweet! I usually don't go for greens but I've been experimenting with color lately and gave it a shot. Also, mint is the way to go this summer. I'm thinking this could work well as an eyeliner accent color. The shimmers in this are insane! It has gold and pink shimmers. I had a little trouble getting it to stick but with a better primer it should work nicely. I'm excited to keep playing around with this color!


Here's a look I did using all of the colors. I used Curious as a brow highlight, Midnight Sea on the lid, London Calling in the crease, Roots Radical on the lower eyelid and My Little Pony as the inner corner highlight. For my waterline, I used MAC's Sea and Sky Mineralize Eyeshadow and for liquid liner I used Wet n' Wild's Mega Liner in Black.


Look at all the shimmer! Now, on to the blush and gloss.


Bronze Goddess Blush
I think this one was added as a bonus for my order but one can never refuse a pretty blush. This peachy-tan blush works as a bronzer too. It's an easy application because you've got a two in one product. It wasn't as long lasting as some of the eyeshadows but that varies from formula to formula. I haven't been using a face primer for a while (tsk, tsk, tsk), so maybe with a primer it will work best. The color did show up nicely and gave my face a warm touch.


Liquid Kiss Luxe in Breathe
I was expecting this color to be a bit more opaque than what it really is, but I'm happy with what I got. This is actually a color I'd use everyday because it makes my pale lips look normal, but better at the same time. Breathe is a beautiful berry color with blue and gold shimmers. What really amazed me about this is how long lasting and hydrating it is! I mean, I applied this in the morning and I still feel it on my lips, eight hours later. I'M NOT KIDDING. The color wears off beautifully. I had absolutely no bleeding and the formula is thick but non-sticky. The texture reminds me of Korres' Lip butter and we all know how I love that thing. I think we might have found a very nice alternative. 


All in all, I am incredibly amazed at the quality of these products, the prices and the huge range of colors, especially rare colors, duo chromes and colors with beautiful shifts. Once I get through my samples and move to NY, I will be ordering more colors from Darling Girl Cosmetics. Don't forget to swing by their webpage and "Ooooh!" and "Aaaah!" at all of the goodies! Also, like their Facebook  page  and blogger too! Thanks to Susan at DGC for being such a doll! Anyways, see you guys soon.  I've got lots of packing and organizing to do before I move to NY next week! I'll keep you guys updated!

Sunday, July 22, 2012

Travel essentials (NY edition)- What's in my suitcase?

Travel essentials


So, the final countdown for my liftoff to New York is here. Only two more weeks, and we all know how fast that goes! I've been organizing what I'll be taking with me to New York because when it comes to traveling, the key is to keep everything essential so you don't go overboard with your suitcase weight limit. Nobody likes to pay extra or have to pluck things out of their suitcases at the last minute!

I thought I'd share with you guys some of the pieces I'll be taking to New York so that you can get some ideas on what to take on your future travels. I always tend to overpack, but this time I'm getting down to the basics because after all, I'll be living there so I can go adding some more statement pieces as I go (including a few made by me!). You all know my addiction to black and gold, so it must be no surprise to see this somewhat mono-ish color palette. Of course, you can adapt it to your own taste. This is just what I'll be taking. The pieces shown are not exactly the ones I own, but pretty darn close.

I always start off with some basic tees and blouses. Things you can match up with any bottom or outwear piece. Button down blouses are excellent because you can dress them up or down. I always take with me a structured blazer that has versatility and a little something extra. A few days ago I finally snagged my dream leopard print blazer (just like my idol, Alison Mosshart) at a fantastic sale price at Zara. This is actually what I'll be wearing to on the plane because of its attitude, look and comfort factors and because it can take up some space in my suitcase so I'd rather carry it on myself. Also, I love wearing denim jackets because I can pair them with just about anything, especially a nice maxi dress to tone it down for a cool day. A little black dress is key for traveling because it is probably the most versatile dress ever. You can play it up with great accessories and simply add a nice pump and you're set! I also like to carry some nice knit sweaters just in case the weather calls for it. A few lightweight skirts and I'm ready to go! I like chiffon pieces because the material is airy and takes up no space in the suitcase. A little steaming when you unpack and you're set!

For accessories, it it important to take control because this is one of the things that can overweight your luggage easily. I like to go with maybe two or three really good necklaces, a couple of cocktail rings, a pair of flats, boots, some pumps (not shown) and maybe a pair of sandals if you're the sandal wearing type (not so much me). What handbags you'll take are crucial because you'll be carrying them around all over the place. I'll be taking my Leather Satchel Co. which is the bag I'll be using for school. It's still at the workshop so it'll be arriving soon and it's tricolor and very similar to the palette above so I can use it with practically everything. I'll also be taking my favorite BCBG python print clutch because it is very small and easy to pack and I can use it for special events. For beauty, plan your favorite looks. I find that taking a good eye palette works best (Too Faced Naked Eye palette is my favorite!) and a few lip colors like a good nude, red and pink would suit any look and a good peachy-toned blush is a universally flattering color.

I'll be playing around with this list and maybe adding a few more pieces but basically this is the gist of it all. Remember these key factors:
  • Pack plenty of neutral pieces so you can mix and match because of their versatility.
  • Keep accessories to a minimum so you don't add extra weight to your bag.
  • Pick pieces with materials that are easy to care for so you don't end up walking around with things that need a little maintenance. Cotton pieces are great for that.
  • The little black dress is your best friend.
  • Plan your beauty products so you can take as least possible because this can also add extra weight to your bag.
  • Take a versatile handbag. A neutral colored one is the best way to go. I recommend black or brown. 
  • Pack travel sized beauty product essentials. If you stay for longer, you can always purchase refills when you arrive or run out. 
  • Keep an open mind and have fun!


Tuesday, July 17, 2012

Changes...


Yes, you still are in The Fashion Skitch! Well, at least this used to be The Fashion Skitch... welcome to Lila Lane.


There comes a time when we face changes in our lives that are for the better. It was about time I gave my blog a little nip tuck here and there and all of a sudden, my title. I'm not saying I didn't like The Fashion Skitch, Heck, I loved it! But coming up is a time of true transition and change for me and although I will always keep at heart the true path of my blog, I want it to represent who I really am. I will always elaborate my DIY, fashion, beauty and illustration posts for you all. This blog is what I think fashion should be. It should be something everyone has a shot at, something personalized, fun and creative. 

I've realized that keeping my personal point of view is essential to make my blog unique as with every other blogger out there. There are thousands of fashion bloggers! Deep down, I knew that at some point, people were going to have to know me for me. My friends all know me by Lila Lane. It's a pseudonym I've established upon myself from a very long time ago. That might not be my real name, but it's me in so many ways. Essentially, I know that I want my readers to know me by me and not just a blog title. So, I've decided to take this step and give it a try. Life's all about decisions and lately, I've been making quite a few. I hope you all understand why I do it. Lila Lane is and always will be The Fashion Skitch, hopefully a little better now!

Wednesday, July 11, 2012

The String Republic


Summer is in full blast and here in Puerto Rico, we have to admit that we've been getting pretty decent weather during this season. Even the most beach-repeller type people (like me) can't resist a stroll through the sand to get some nice ocean breeze. Since I'm not one to frequent the beach so much, I like my summer wardrobe and accessories to adapt to any occasion/season. 
via String Republic

Recently I found out about the coolest shoes for summer that can transition into any season and location with the world's greatest ease. I can use them for sunny days at the beach but I can also use them for a stroll through the city, running errands, hanging out... you name it! They're called String Republic. Their key trademark is that they're espadrilles, but not quite. Their base is made from yute just like espadrilles but they resemble sneakers, brogues and other shoes styles! The come in different collections: The String Republic, Unbelievable but Fake, and Archibald. Also, they're available in women's, men's and children's sizes.


via String Repblic

I think what called out to me the most was the grand variation of styles and designs. The String Republic collection has a plethora of prints made by international artists and illustrators that give the shoes a funky street edge and the Unbelievable but Fake collection give the illusion of a completely different style of shoe. Some people won't believe that they're really espadrilles! After reviewing the selection available, I ended up choosing from the Unbelievable but Fake collection the Kayak Red Peas. They were my first pick simply because to me, they're the most adorable of the bunch and being as red is my favorite color I couldn't resist the urge to get myself a pair! They're ballerina style shoes that look like top siders! I instantly knew I'd wear the heck out of them. Guess who's been bringing some color into her wardrobe? Oh yes!

Meet my #1 model, Schmookums!
When I got them, I was immediately blown away by the quality of the materials and construction. These are hand sewn so you can guarantee they won't be falling appart any time soon because they're not glued together. The material of the shoe itself was way sturdier than I imagined and the print was so bright and crisp! To me, the best part of these shoes is that they are so lightweight. I can literally put these on all day and I forget I have any shoes on. The only thing that must be noted is that they do tend to be a little tight at first but after the second or third wear, they'll accomodate to your feet. I've been wearing mine non-stop since I got them so they're perfectly adjusted already. As for the price, I think it's pretty fantastic. They retail for $55.00, so for a shoe that is hand made and of this quality, you're getting a very good value for your buck. I'm sure I'll be sporting these around the city a lot once I move to New York! 

Since I've been packing up my stuff and taking everything I don't really need back home, I've got a limited amount of clothes for this next month so of course, I realized I had taken my favorite bathing suit back home. Anyways, I didn't go into the water that day and I just went for a stroll at the beach with  Mr. Boyfriend (thanks for the pictures, love!) so just to show you how fun these shoes look, here's my  outfit of the day:


I wore my favorite nude button down blouse and straw hat from F21, my trusty Ray-Ban Wayfarers, the awesome Kayak Red Peas from The String Republic, my go-to cargo shorts, my studded leather belt from Joe's Jeans and my Erika Peña Square Moni necklace. 


You can check out the variety of shoes String Republic has to offer. Swing by their Facebook page and make your selection! Shop until you drop at www.stringrepublic.com and www.fave8.com. You can also follow them on Twitter (@TheStringRep) and on Instagram too (TheStringRepublic). You can e-mail them at info@stringrepublic.com. Also, don't forget to subscribe to this blog via Google Friend Connect for the latest and to my Facebook and Tumblr for even more updates and treats. Also, follow on Instagram! I'm LilaLane. 

Saturday, July 7, 2012

Skitch-I-Y: Sailor Moon Nails!


A few days ago, one of my readers linked me an idea for Sailor Moon nails. Sailor Moon is very dear to my heart, being as that is the first cartoon/anime I mastered drawing when I was 7 years old.  I instantly knew that this was a mani I had to try out. So, we're straying a bit from fashion today but I know that deep down some of you are true Sailor Scouts at heart! Because after all, we do it all in the name of love and justice! This one's for my girls over at Ouna's Closet.


You'll need:
Base coat
Nude nail polish
White nail polish
Blue nail polish
Red nail polish
Yellow/gold nail polish
Black thin brush nail polish
Top coat

(This is for the Sailor Moon nail. Change colors accordingly depending on the scout of your choice)


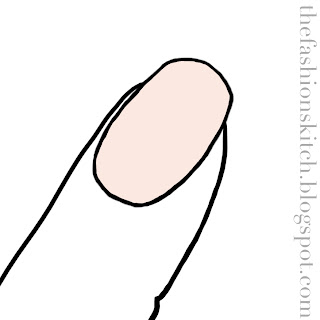
Step 1: Prep and prime your nails with a base coat. After your nails are dry, apply an even coat of a nude nail color. I used Jessica's Nail Gone Bare. 


Step 2: Draw two large triangles from one upper corner of the nail to the other. This will be the scout's sailor collar. I used Gosh's 006 Attitude.


Step 3: Take your white nail polish and wipe off all of the excess off the brush onto the bottle mouth. Use the border of the brush and draw two lines towards the center about a quarter of an inch away from the blue borders of the scout's neckline. You can do one or two. It will be easier to make the line/s if you have a thin brush polish or a thin polish brush. I just used me Sinful Colors Snow Me White polish for that.


Step 4: Take your white polish and paint over the bottom half to represent the scout's torso after all of the blue polish has dried completely. 


Step 5: Once the white has dried, take your red polish and draw two small isosceles triangles. I used a mix of red polishes since the one I own is a bit dark but any bright red will do.


Step 6: Draw two overlapping larger triangles over the smaller ones to complete the bow shape.


Step 7: Take your black thin brush polish and draw two lines along the center of both larger triangles to simulate the folds of the bow.


Step 8: Once the bow has dried, paint a yellow/gold circle in the center of the bow. It should cover the entirety of the center. I used Bettina's Sunrise and Glamourous for this because I wanted it to shine a bit more.


After it is dry, apply a top coat and you're done! I use Seche Vite for a rapid drying coat that will last me a very long time. If you like, you can paint each nail accordingly to a different Sailor Scout and you can get something like this:

Instagram: LilaLane


Since I loved the navy blue Gosh polish, I decided to change my other nails and do a gold gradient on them. Give them a shot!

Remember to "Like" The Fashion Skitch on Facebook and follow on Tumblr and Instagram. I'm LilaLane! See you guys on my next post!


LinkWithin

Related Posts Plugin for WordPress, Blogger...